Vendors Text Area Editor
Text Area Editor Details
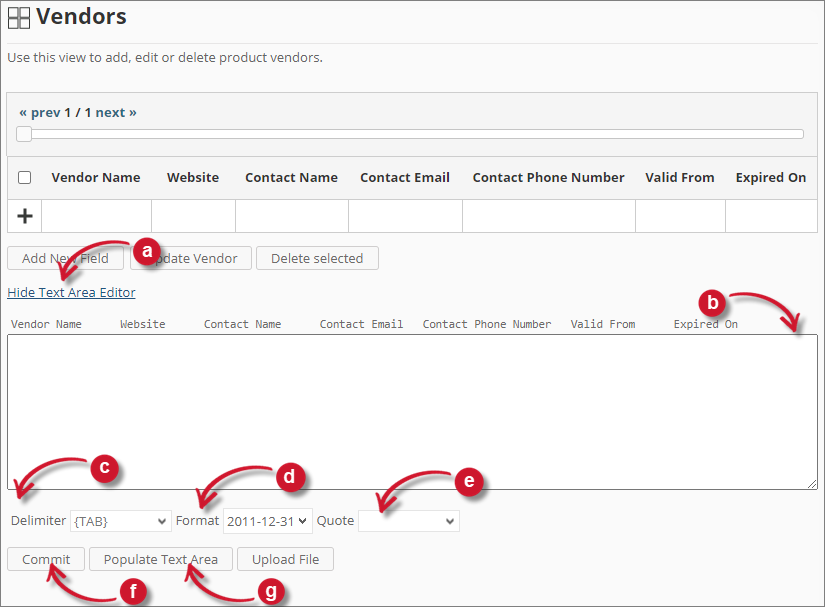
The text area editor is another way to add, edit, and delete records in the list. The editor has the following components:
Text Area Editor Details
| Component | Description |
|---|---|
| Toggle Link (a) | Toggles the display of the text area editor. |
| Text Area (b) | Area where to paste and manipulate the records. |
| Delimiter (c) | The character to use as a separator for each item in a record. |
| Format (d) | The format to use for dates. |
| Quote (e) | Quotation marks to use to separate each item in a record. |
| Commit (f) | Saves the changes made in the text area. |
| Populate Text Area (g) | Retrieves all the records from the table and displays them in the text area. |
Text Area Editor Components
Using Text Area Editor
Follow these instructions to use the text area editor:
Text Area Editor
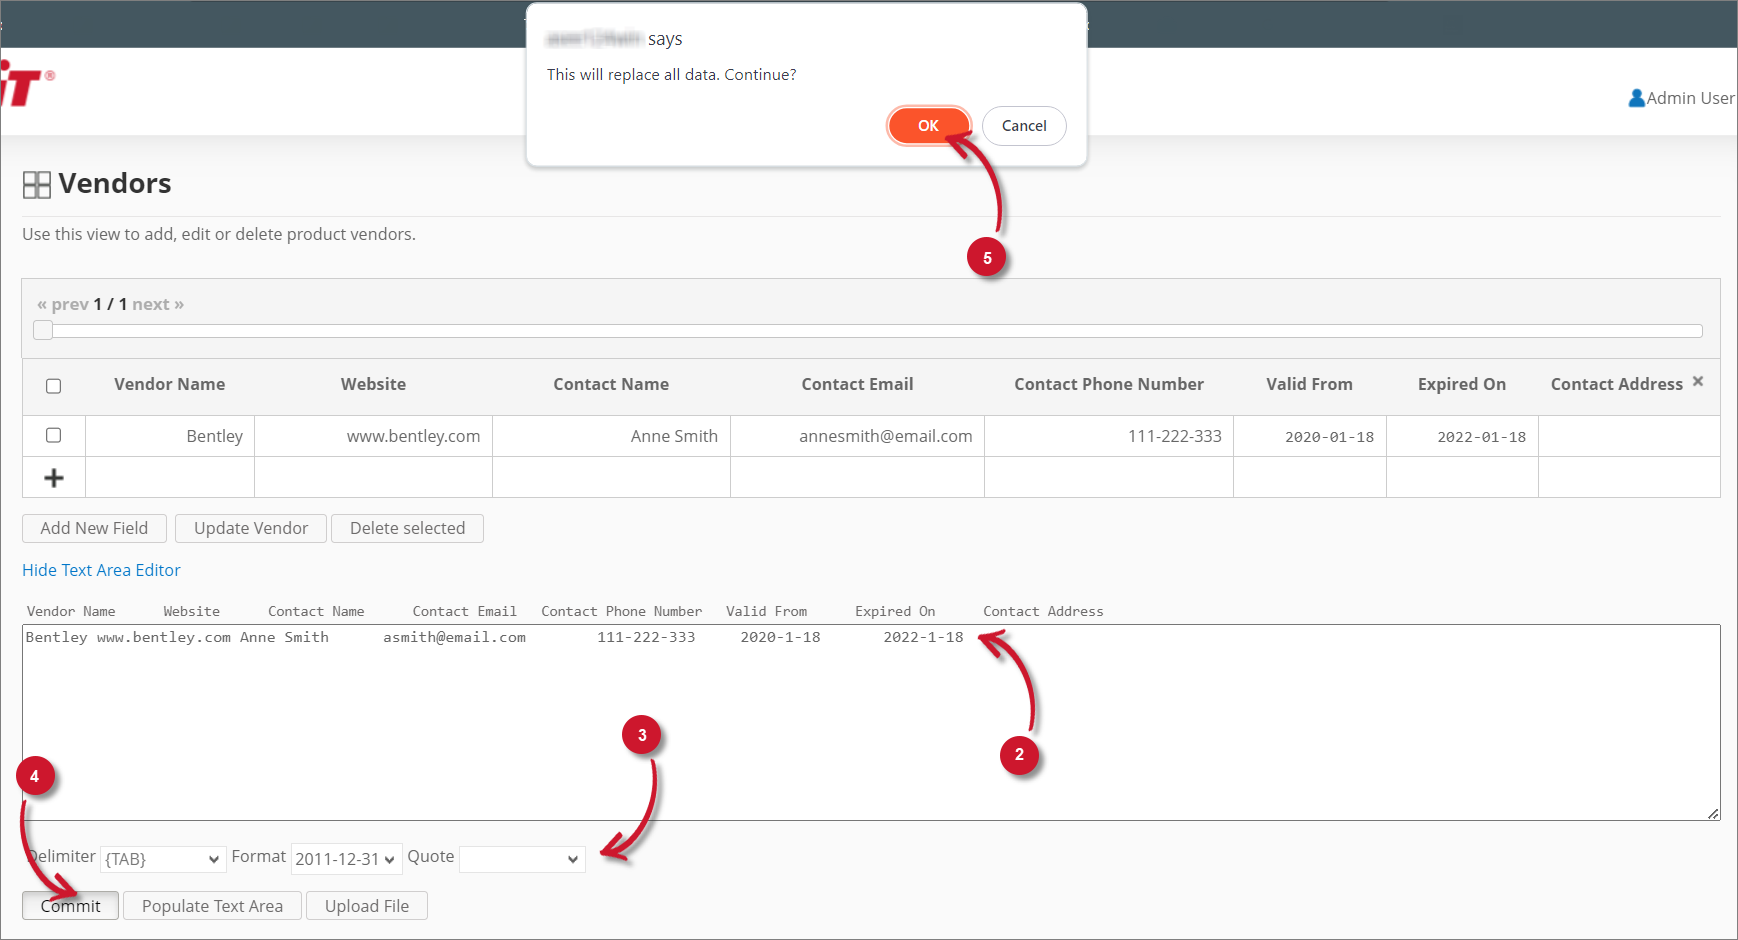
- Click the toggle link Show/Hide Text Area Editor. The Text Area Editor should be displayed.
- Click the Populate Text Area button. The text area editor should be populated.
- Modify the records as desired. Use the components for Delimiter, Format, and Quote.
- To add a record, simply add a new line.
- To delete a record, delete the entire row of the record.
- Click Populate Text Area to apply the selected formats. The selected delimiter, format, and quote should be applied in the text area editor.
- Click the Commit button. A warning message should appear to confirm the application of the changes.
- Click OK to continue. The list should automatically be updated.
Uploading a Source File
Follow these instructions to upload a prepared source file of Vendor details:
Uploading a Source File
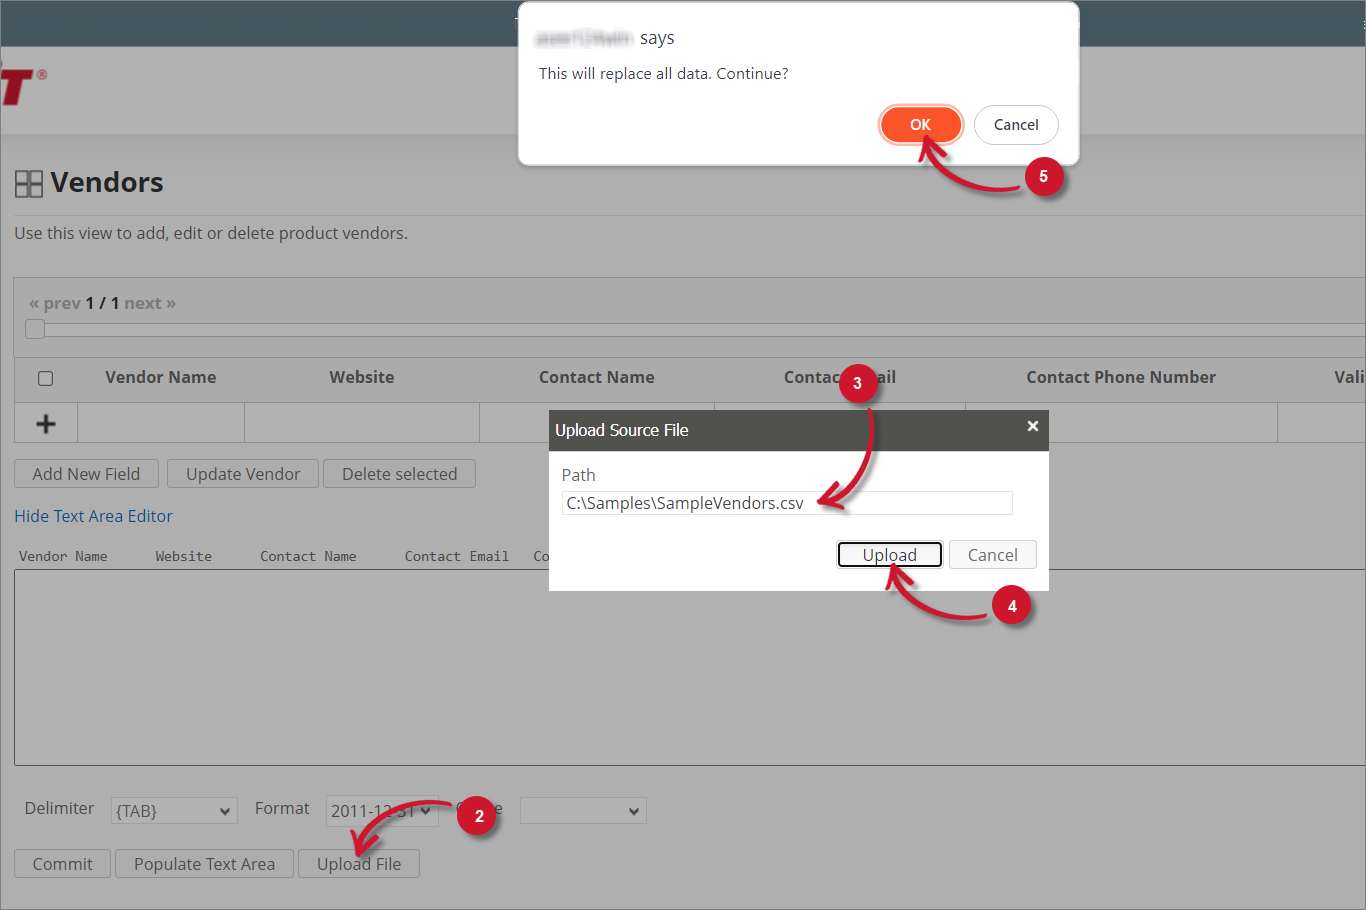
- Click the Toggle Link of the Text Area Editor.
- At the bottom of the page, click the Upload File button.
- The Upload Source File dialog should appear.
- Provide the valid path of the source file. The UNC path (
\\path_to_file) is accepted. - Click the Upload button to continue.
- A confirmation message of the upload process should appear.
- Click OK to continue.