Users
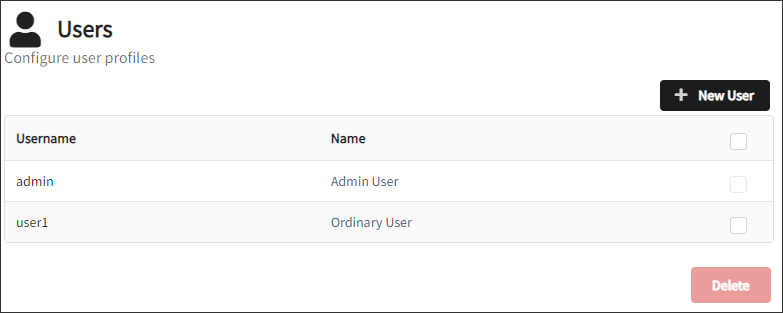
The Users tab lists all existing users and allows the administrator to create users, modify user details, and delete users.
Creating a User Account
-
Go to Administration > Users.
-
Click New User on the upper-right corner of the page.
 Creating New User Account
-
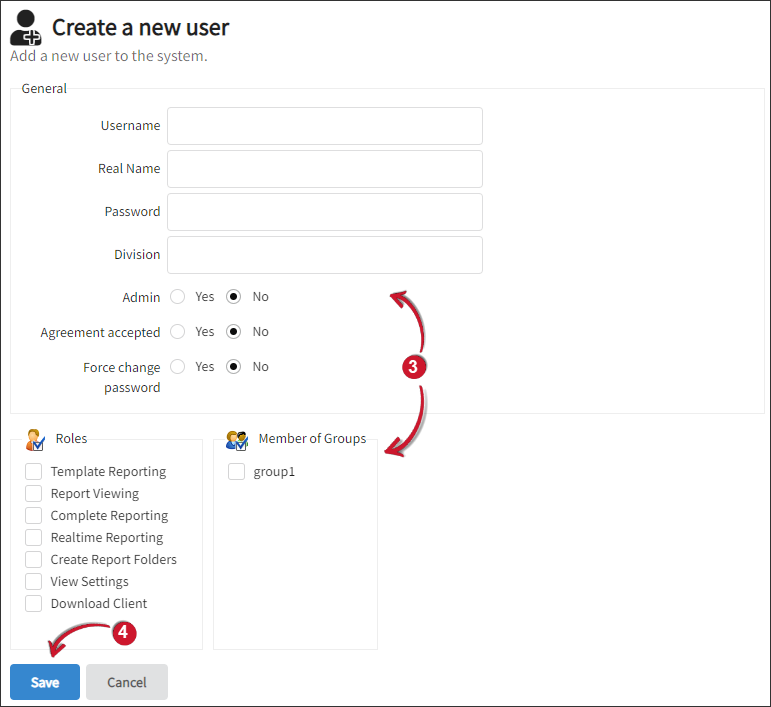
Fill out the General section. Tick the desired Roles for the user and the Group where they will belong.
The data type and folder access are at a group level only. Make sure to assign a user to at least one group.
Roles Tracking View and Add Reports Complete Selection Template Selection Periodic Jobs Generated Reports Settings Download Template Reporting ✔️ ✔️ ✔️ ✔️ Report Viewing ✔️ Complete Reporting ✔️ ✔️ ✔️ ✔️ Realtime Reporting ✔️ Create Report Folders ✔️ ✔️ ✔️ View Settings ✔️ Download Client ✔️ User Access Rights Based on Roles
warningStarting from version 10.2, users with the Report Viewing role and the Template Reporting and Complete Reporting roles can still modify any generated report.
noteThe Settings tab is only visible to non-admin users.
-
Click Save.
 User Account Details
Modifying a User Account
- Go to Administration > Users.
- Click the name of the user to modify.
- Make the necessary changes to the user account.
- Click Save.
Removing a User Account
-
Go to Administration > Users.
-
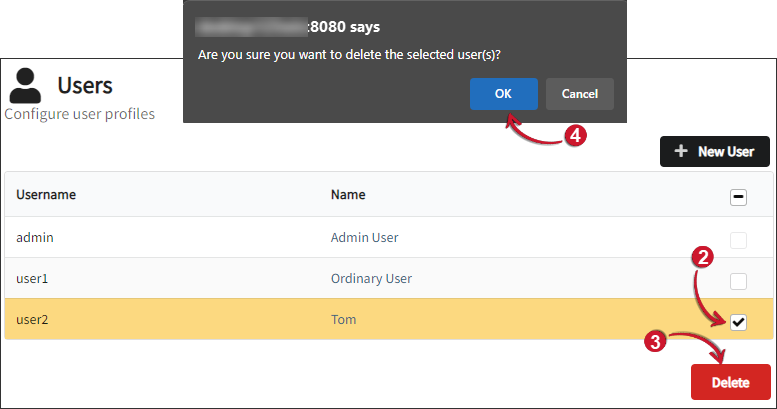
Tick the checkbox corresponding to the user account(s) to remove or tick the checkbox on the top row to select all.
noteThe Admin User cannot be deleted.
-
Click Delete.
-
Click OK on the pop-up.
Updating User Settings
Non-admin users have limited access rights and provisions when logged on to the Open iT web interface. However, they can still change a few settings if they have View Settings access rights. To change user settings, follow the steps:
- Log in to the Open iT Web Interface.
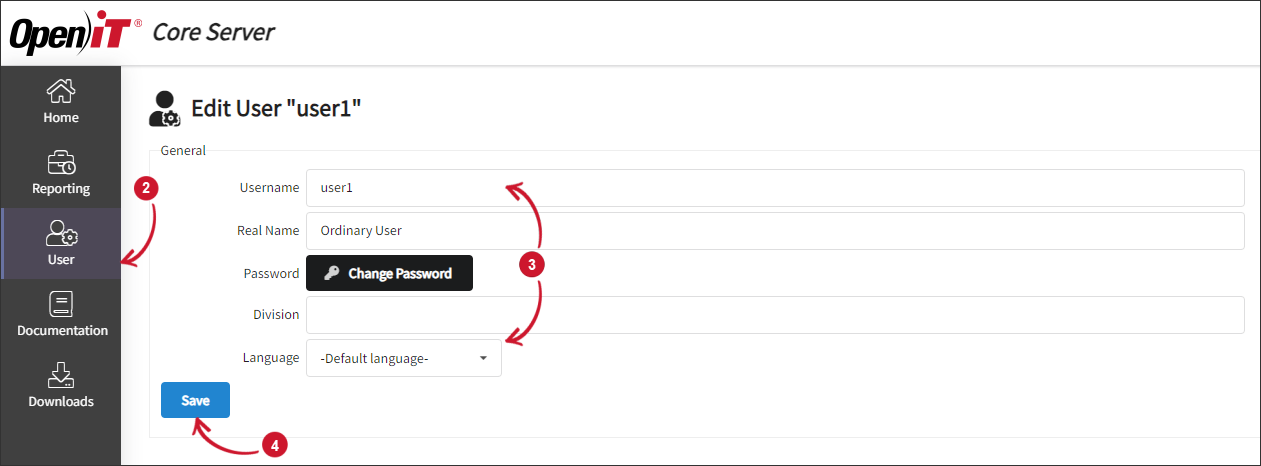
- After logging in, notice a new tab labeled User, click on it.
- Apply your desired changes to the Username, Real Name, Password, Division, or Language.
- Click Save.