Registry Settings
The Registry contains the page settings where users can activate/deactivate pages and configure page component settings.
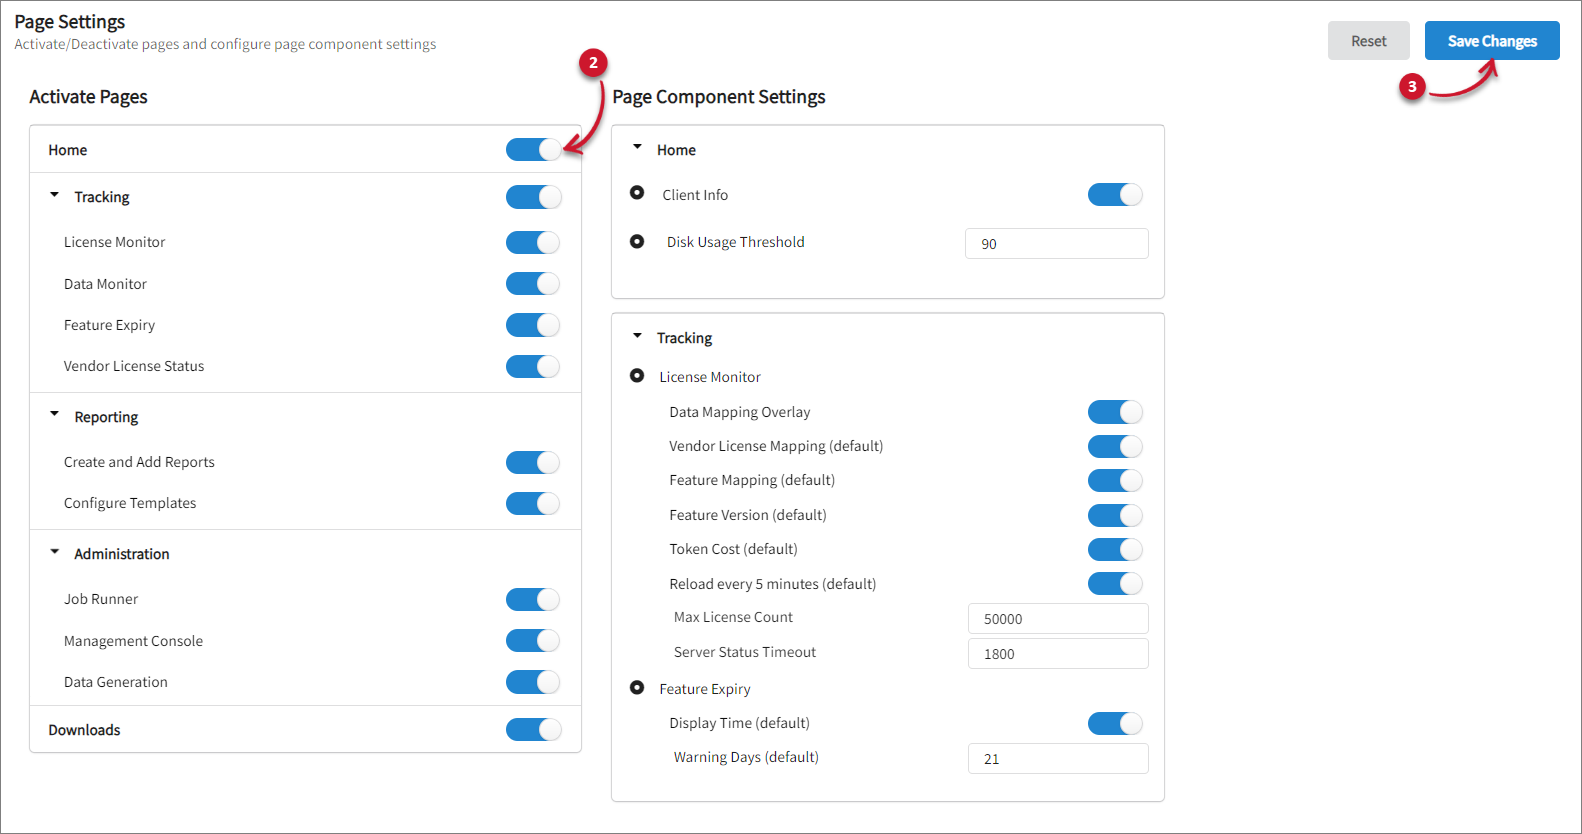
Activating the Home Tab
The Home tab is activated by default. Follow these steps in case it needs to be activated:
-
Go to Administration > Settings > Registry.
-
Turn on Home.
-
Click Save Changes, then verify if the Home tab is visible.
 Activating the Home Tab
Activating the Tracking Tab
The Tracking tab is activated by default. Follow these steps in case it needs to be activated:
-
Go to Administration > Settings > Registry.
-
Turn on Tracking.
NOTEThis will only be visible if either License Monitor, Data Monitor, Feature Expiry, Vendor License Status, or all the mentioned tabs are activated.
-
Click Save Changes.
 Activating the Tracking Tab
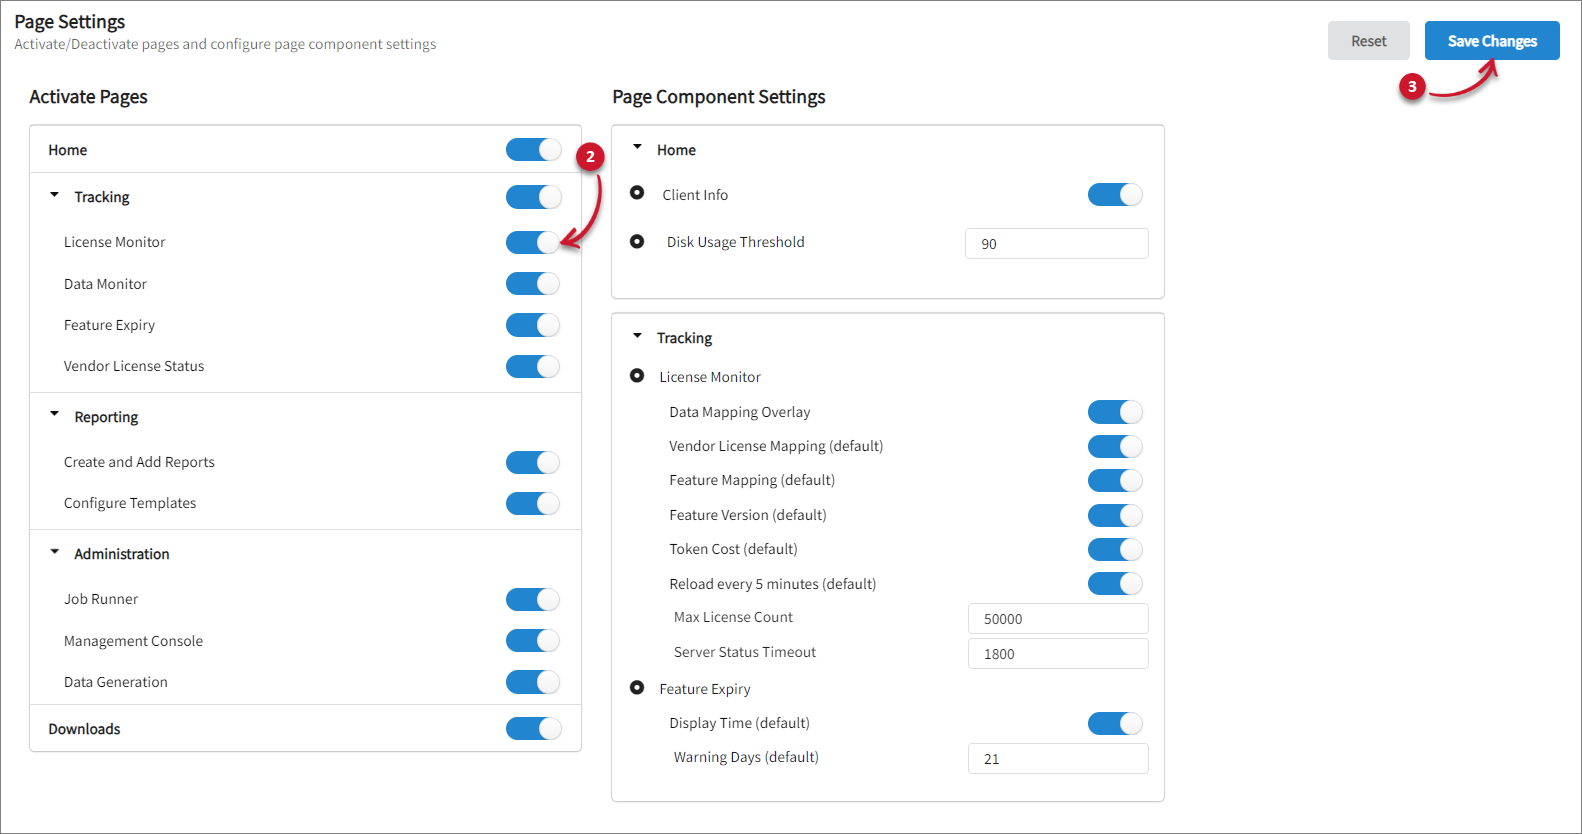
Activating the License Monitor Tab
The License Monitor tab is activated by default. Follow these steps in case it needs to be activated:
-
Go to Administration > Settings > Registry.
-
Expand and turn on Tracking under Activate Pages, then turn on License Monitor.
-
Click Save Changes.
 Activating the License Monitor Tab
-
Hover over the Tracking tab, then verify if the License Monitor tab is visible.
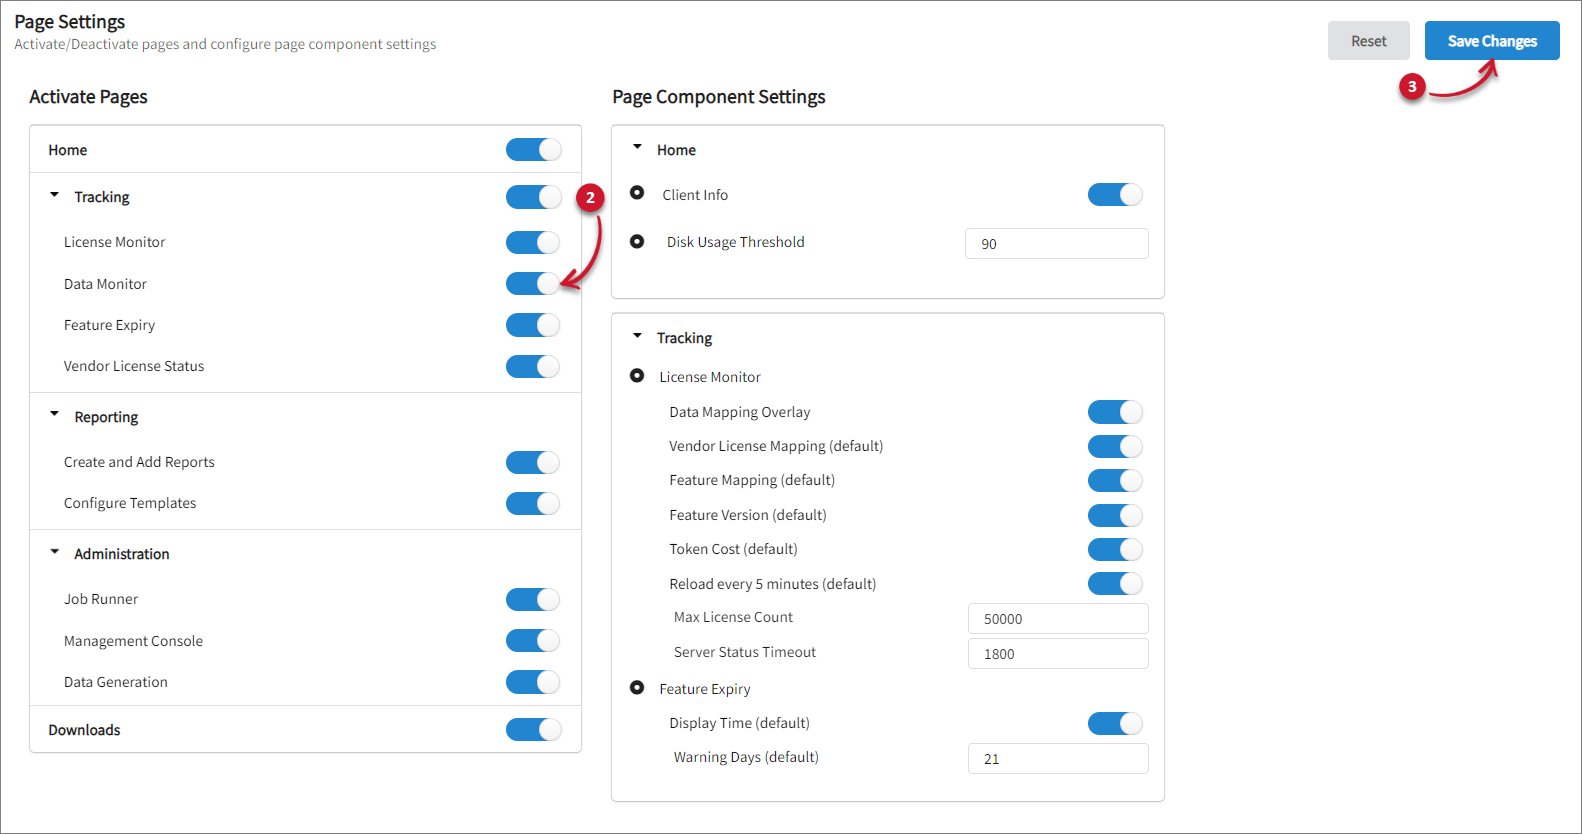
Activating the Data Monitor Tab
-
Go to Administration > Settings > Registry.
-
Expand and turn on Tracking under Activate Pages, then turn on Data Monitor.
-
Click Save Changes.
 Activating the Data Monitor Tab
-
Hover over the Tracking tab, then verify if the Data Monitor tab is visible.
Activating the Feature Expiry Tab
-
Go to Administration > Settings > Registry.
-
Expand and turn on Tracking under Activate Pages, then turn on Feature Expiry.
-
Click Save Changes.
 Activating the Feature Expiry Tab
-
Hover over the Tracking tab, then verify if the Feature Expiry tab is visible.
Activating the Vendor License Status Tab
-
Go to Administration > Settings > Registry.
-
Expand and turn on Tracking under Activate Pages, then turn on Vendor License Status.
-
Click Save Changes.
 Activating the Vendor License Status Tab
-
Hover over the Tracking tab, then verify if the Vendor License Status tab is visible.
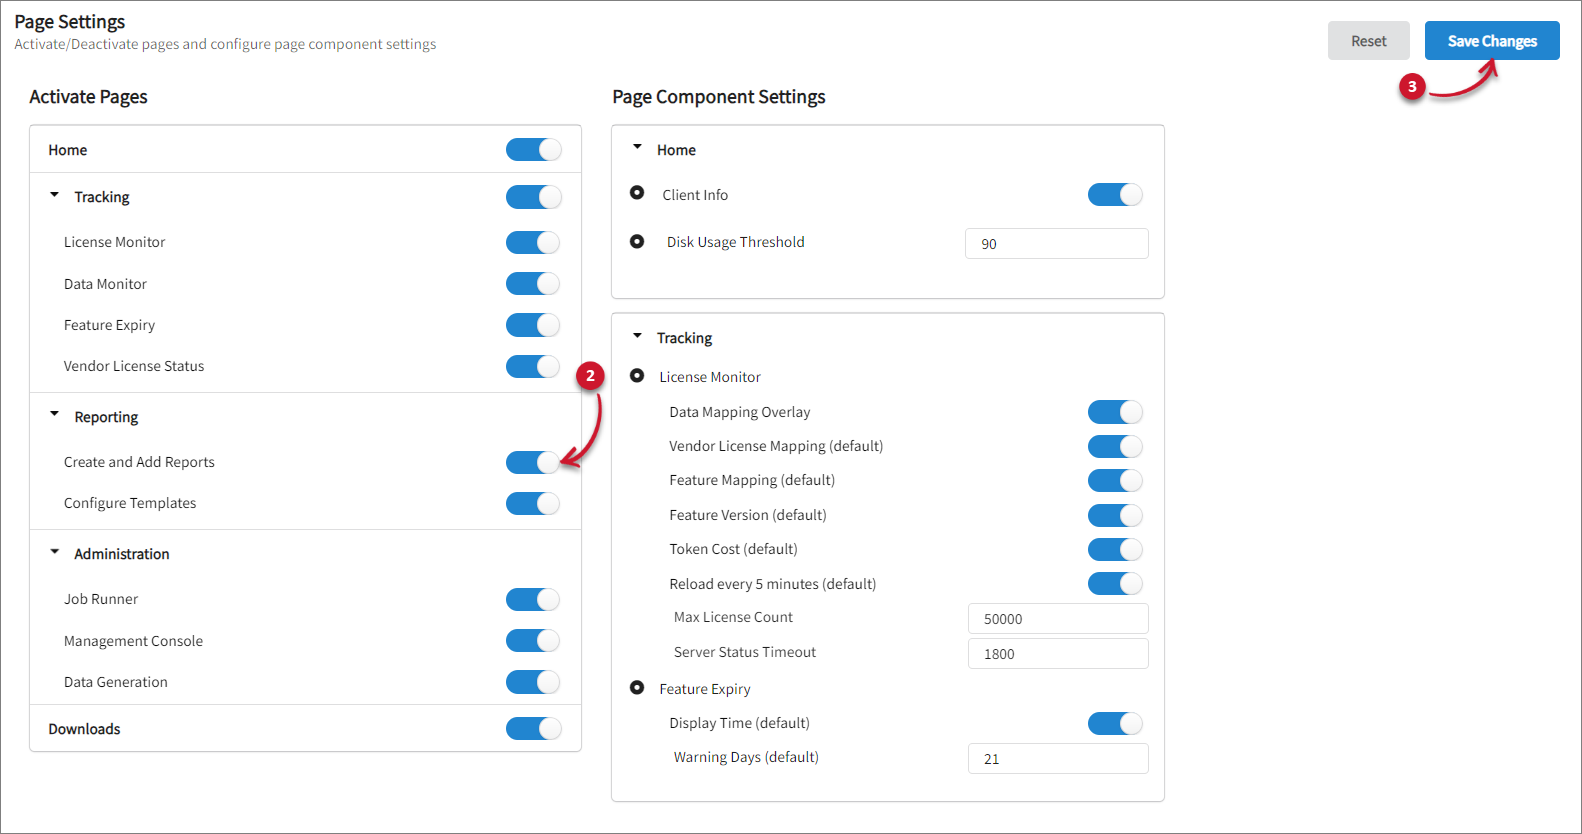
Activating the Create and Add Reports Tab
The Create and Add Reports tab is activated by default. Follow these steps in case it needs to be activated:
-
Go to Administration > Settings > Registry.
-
Expand Reporting, then turn on Create and Add Reports.
-
Click Save Changes.
 Activating the Create and Add Reports Tab
-
Hover over the Reporting tab, then verify if the Create and Add Reports tab is visible.
Activating the Configure Templates Tab
-
Go to Administration > Settings > Registry.
-
Expand Reporting, then turn on Configure Templates.
-
Click Save Changes.
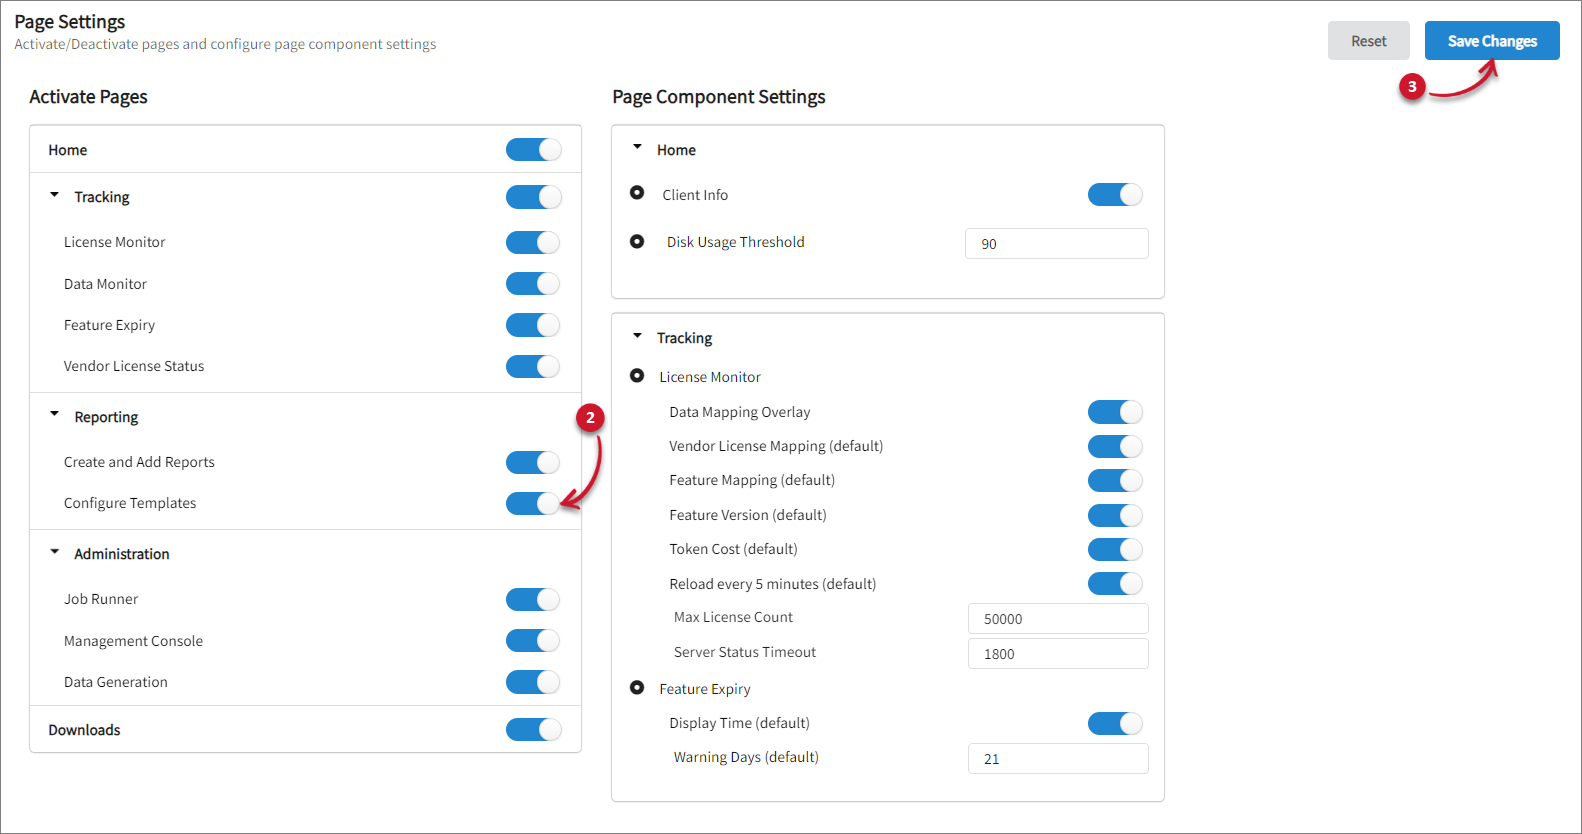 Activating the Configure Templates Tab
-
Hover over the Reporting tab, then verify if the Configure Templates tab is visible.
Activating the Job Runner Tab
-
Go to Administration > Settings > Registry.
-
Expand Administration, then turn on Job Runner.
-
Click Save Changes.
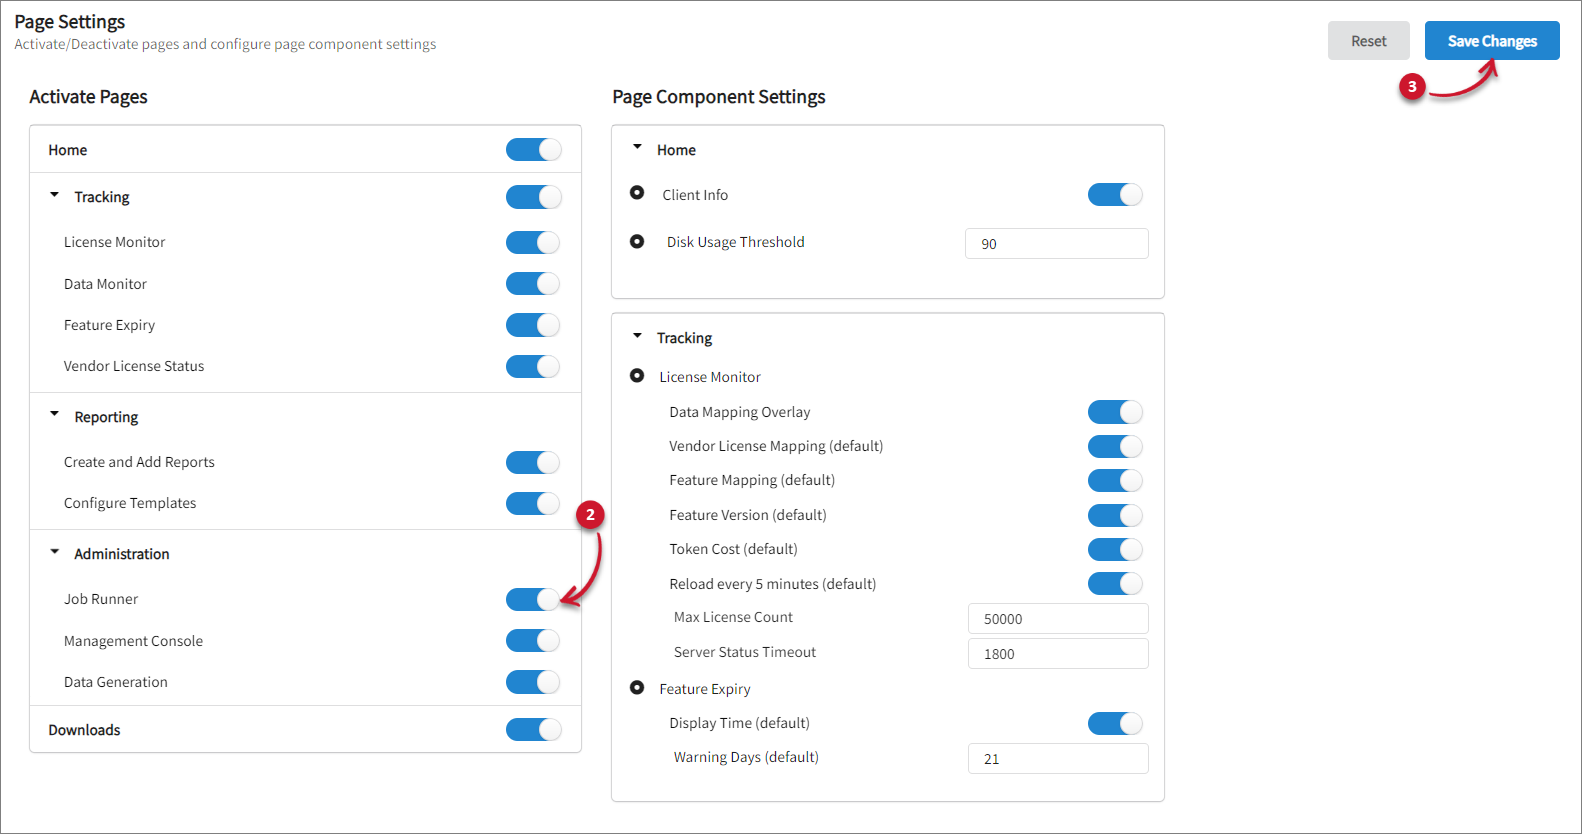 Activating the Job Runner Tab
-
Hover over the Administration tab, then verify if the Job Runner tab is visible.
Activating the Management Console Tab
-
Go to Administration > Settings > Registry.
-
Expand Administration, then turn on Management Console.
-
Click Save Changes.
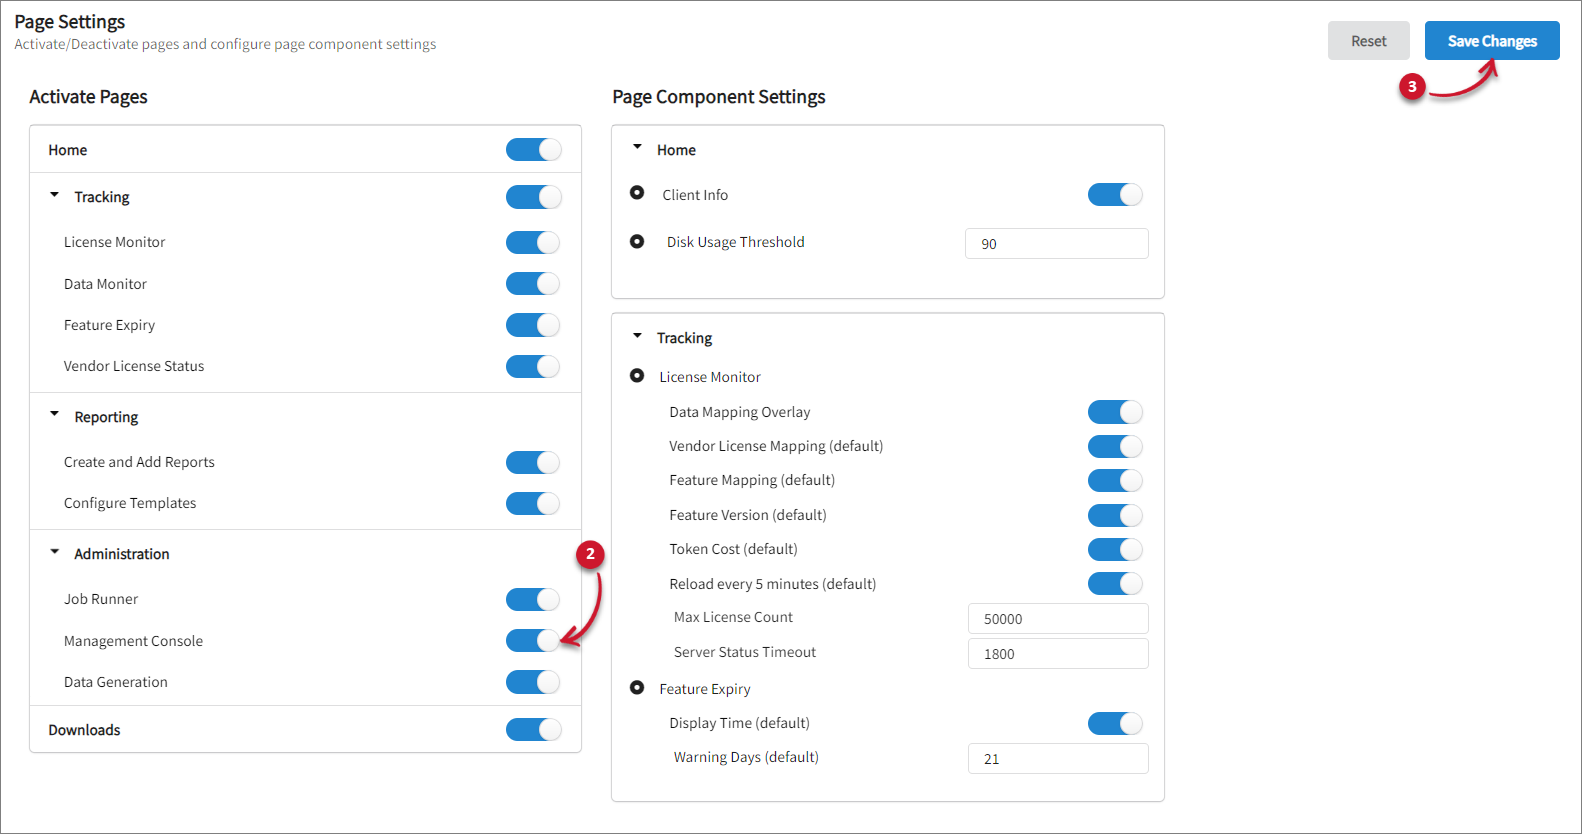 Activating the Management Console Tab
-
Hover over the Administration tab, then verify if the Management Console tab is visible.
Activating the Data Generation Tab
-
Go to Administration > Settings > Registry.
-
Expand Administration, then turn on Data Generation.
-
Click Save Changes.
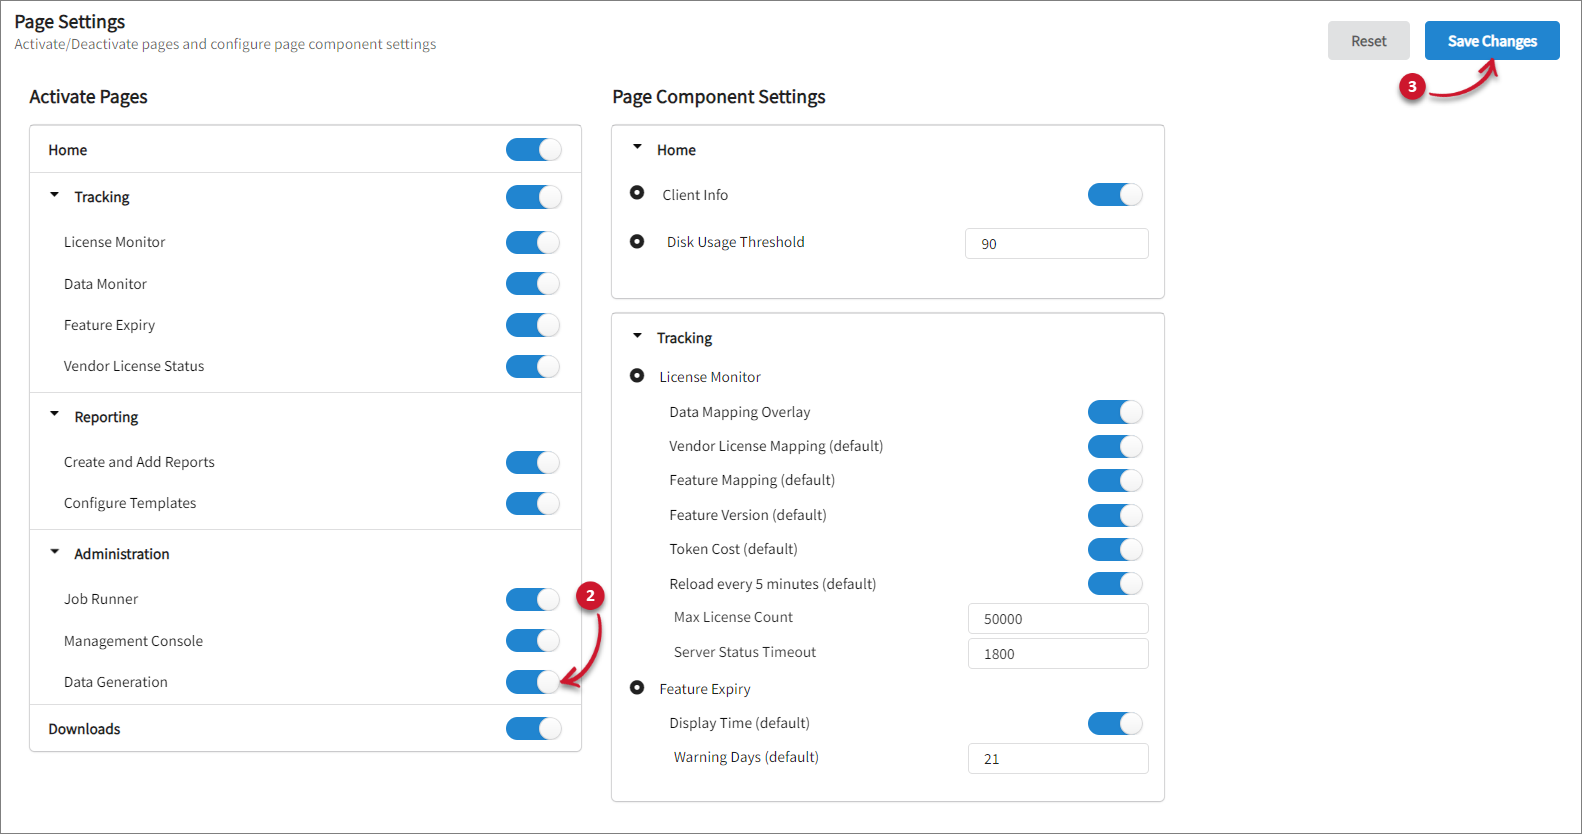 Activating the Data Generation Tab
-
Hover over the Administration tab, then verify if the Data Generation tab is visible.
Activating the Downloads Tab
The Downloads tab is activated by default. Follow these steps in case it needs to be activated:
-
Go to Administration > Configuration > Registry.
-
Turn on Downloads.
-
Click Save Changes, then verify if the Downloads tab is visible.
 Activating the Downloads Tab
Managing Home Page Component Settings
This component cannot be updated if the Home registry is disabled.
Displaying Client Information in the Home Tab
-
Go to Administration > Settings > Registry.
-
Expand Home, then turn on Client Info.
-
Click Save Changes.
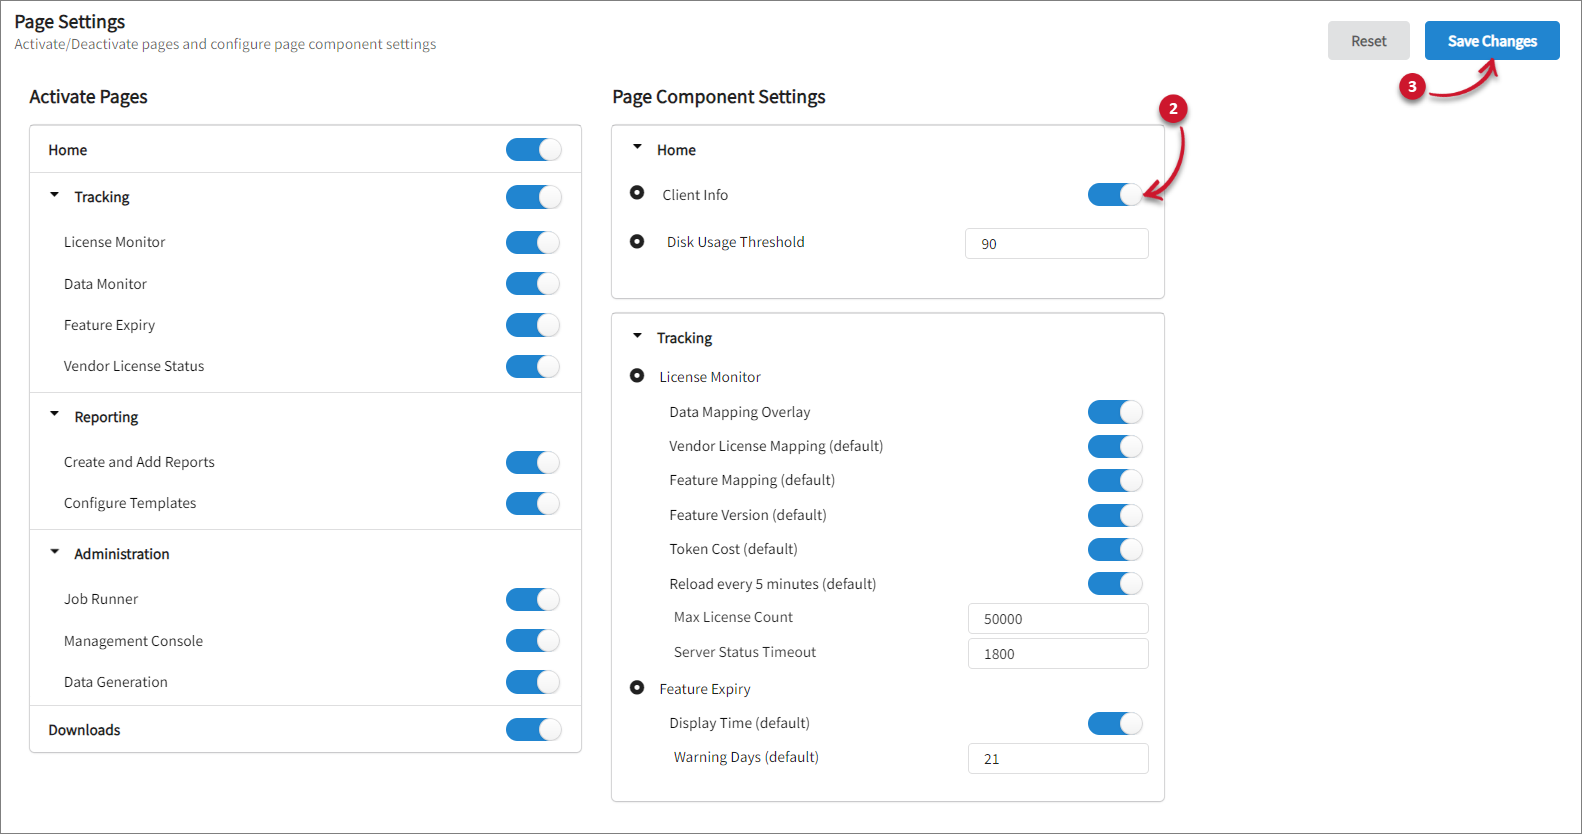 Activating Client Info
-
Go to the Home tab, then verify if the Client Info is visible.
Setting the Disk Usage Threshold
-
Go to Administration > Settings > Registry.
-
Expand Home under Page Component Settings, then set the desired value for Disk Usage Threshold.
-
Click Save Changes.
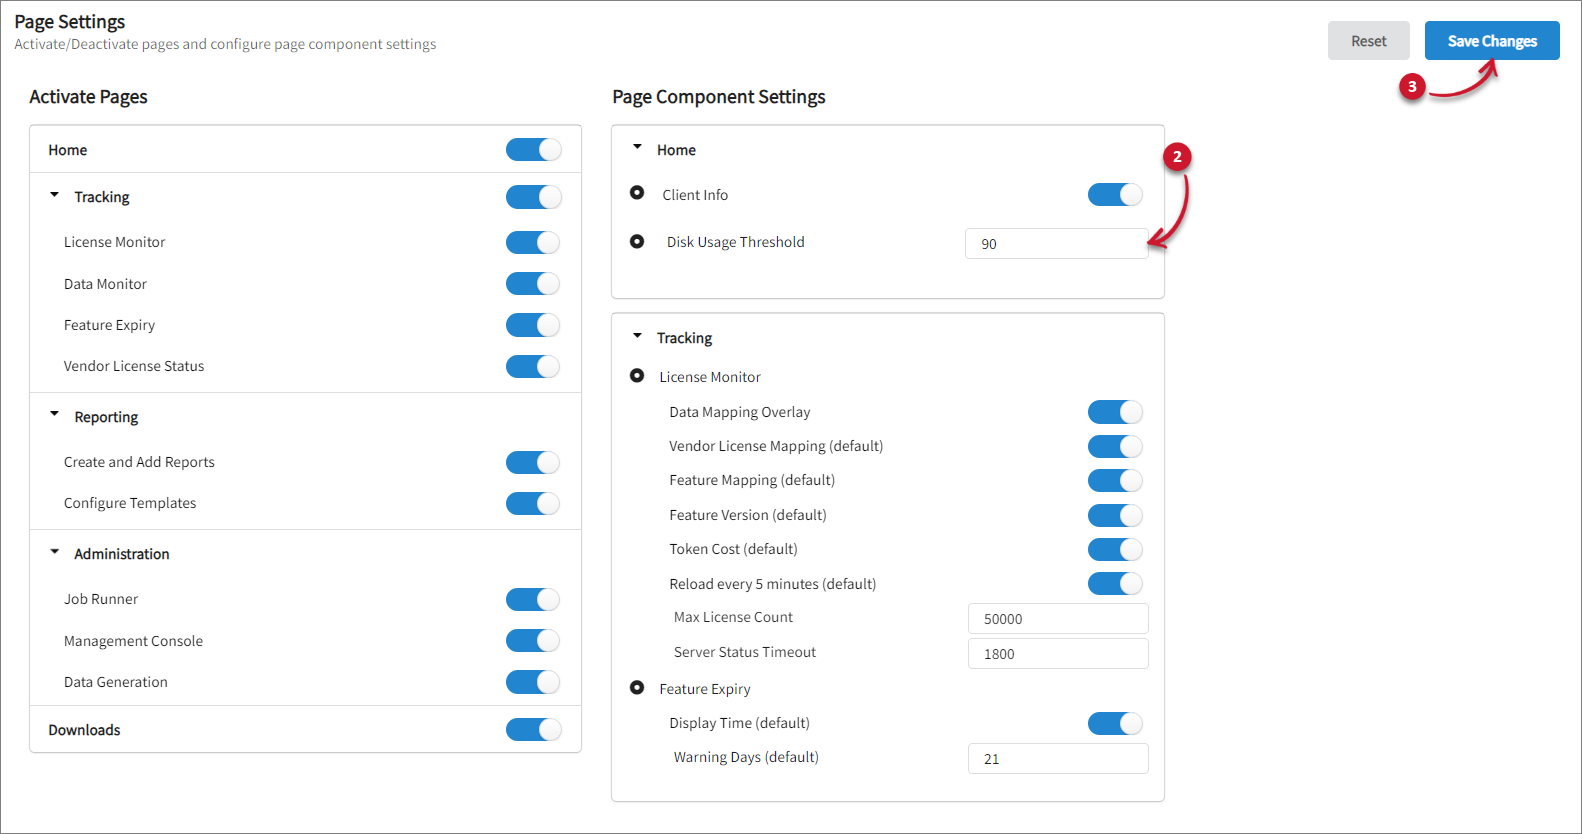 Setting the Disk Usage Threshold
Managing License Monitor Page Component Settings
This component cannot be updated if the License Monitor registry is disabled.
Activating Data Mapping Overlay
-
Go to Administration > Settings > Registry.
-
Expand Tracking under Page Component Settings, then turn on Data Mapping Overlay.
-
Click Save Changes.
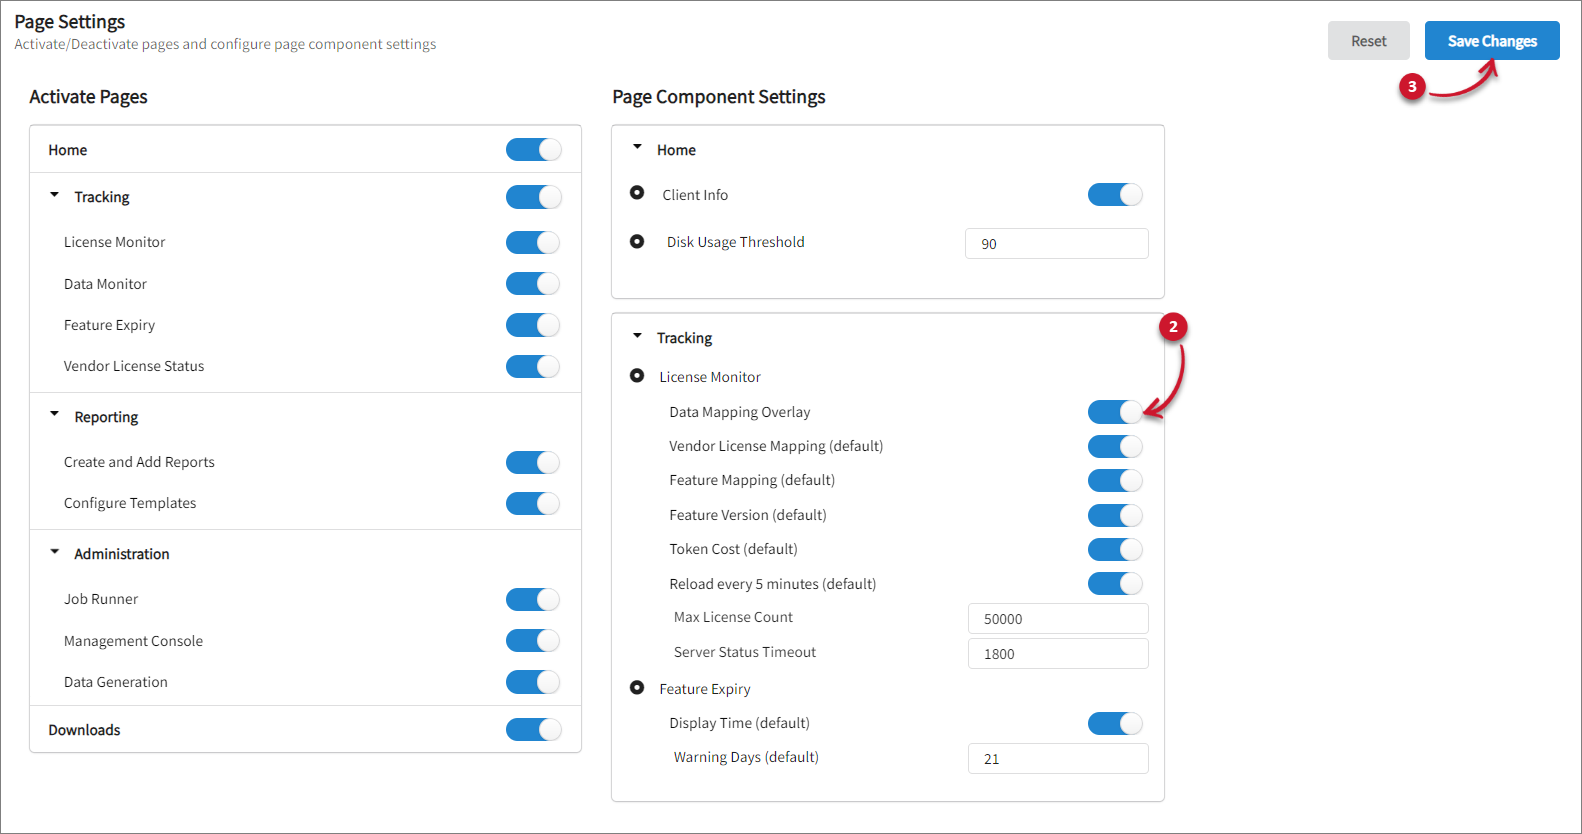 Activating Data Mapping Overlay
Activating Vendor License Mapping by Default
-
Go to Administration > Settings > Registry.
-
Expand Tracking under Page Component Settings, then turn on Vendor License Mapping (default). This displays the vendor license usage in the License Monitor based on vendor license mapping.
-
Click Save Changes.
 Activating Vendor License Mapping
Activating Feature Mapping by Default
-
Go to Administration > Settings > Registry.
-
Expand Tracking under Page Component Settings, then turn on Feature Mapping (default). This displays the vendor license usage in the License Monitor based on feature mapping.
-
Click Save Changes.
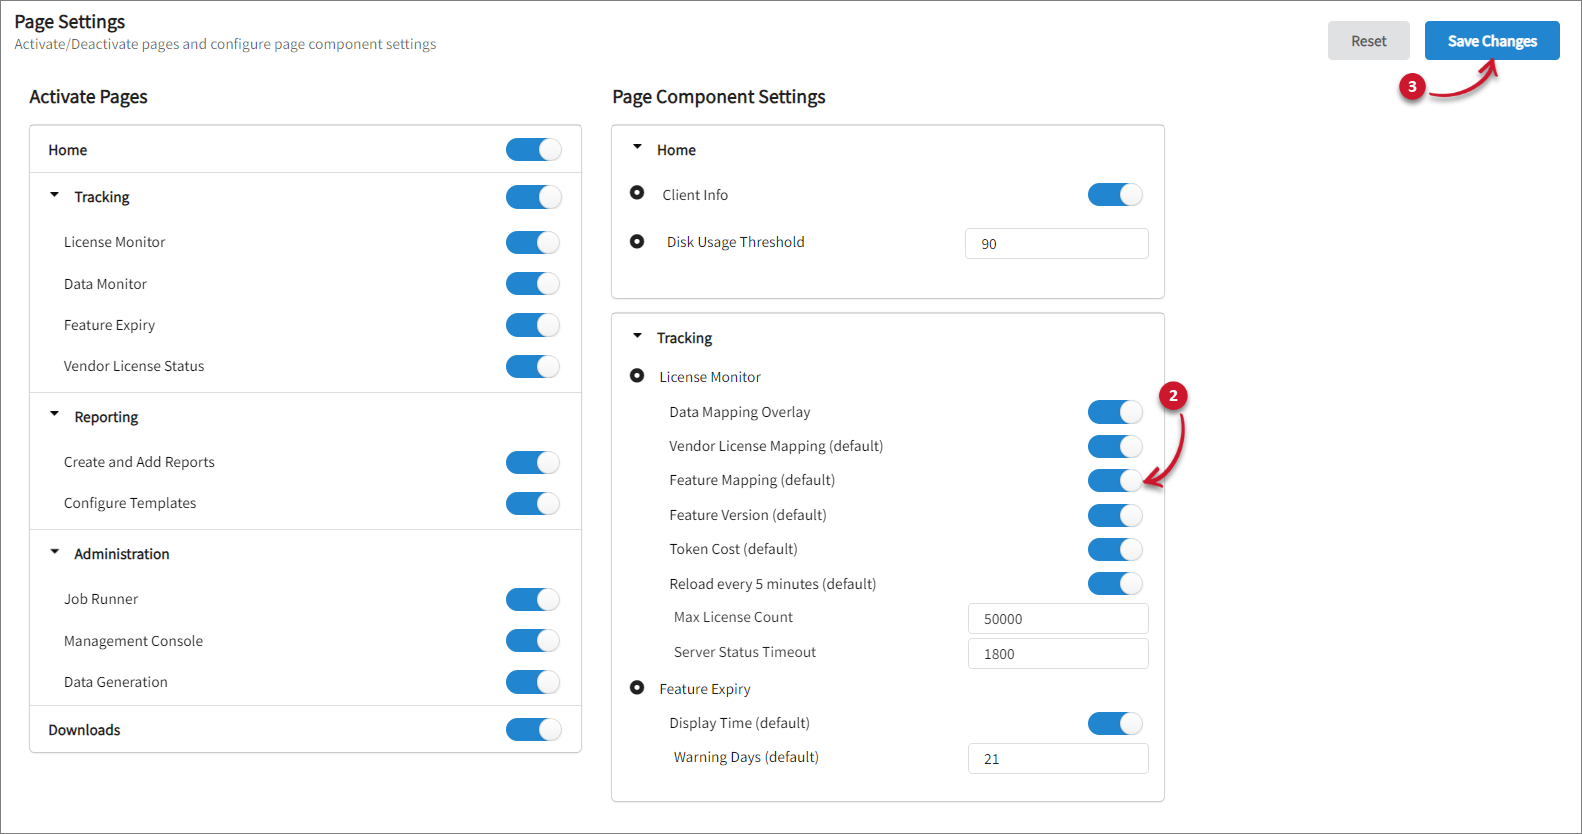 Activating Feature Mapping
Activating Feature Version by Default
-
Go to Administration > Settings > Registry.
-
Expand Tracking under Page Component Settings, then turn on Feature Version (default). This displays the vendor license usage in the License Monitor based on feature version.
-
Click Save Changes.
 Activating Feature Version
Activating Token Cost by Default
-
Go to Administration > Settings > Registry.
-
Expand Tracking under Page Component Settings, then turn on Token Cost (default). This displays the vendor license usage in the License Monitor based on token cost.
-
Click Save Changes.
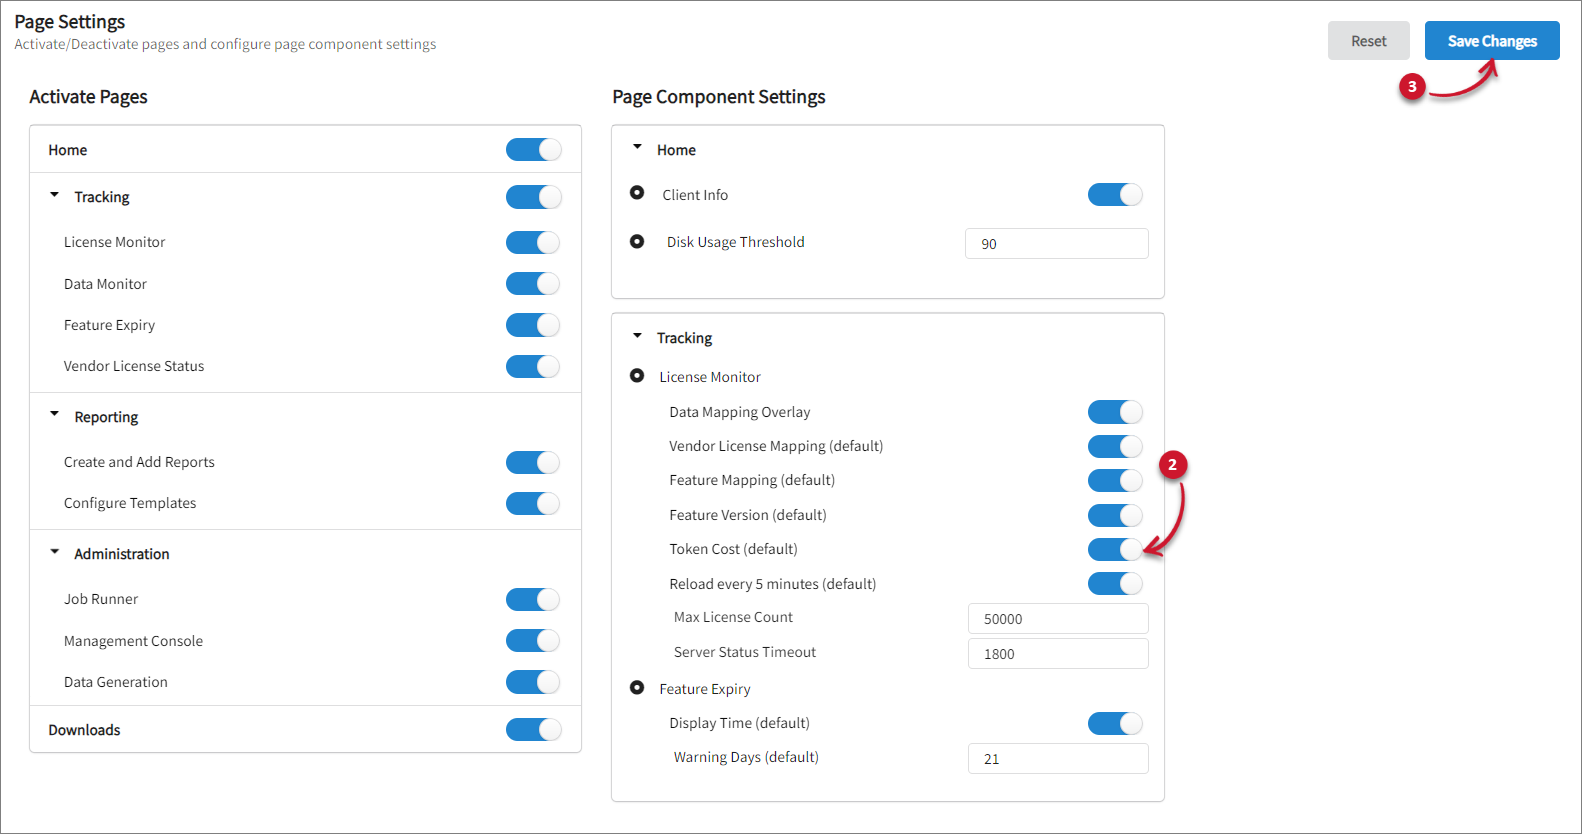 Activating Token Cost
Activating Reload Every 5 Minutes in the License Monitor
The Reload every 5 minutes feature is enabled by default upon installation. If it has been disabled, please refer to the instructions below to enable it.
-
Go to Administration > Settings > Registry.
-
Expand Tracking under Page Component Settings, then turn on Reload every 5 minutes (default). This will automatically check the Reload every 5 minutes in the License Monitor.
-
Click Save Changes.
 Setting the License Monitor Max License Count
Setting the License Monitor Max License Count
-
Go to Administration > Settings > Registry.
-
Expand Tracking under Page Component Settings, then set the desired value for Max License Count. The default value is 50000.
-
Click Save Changes.
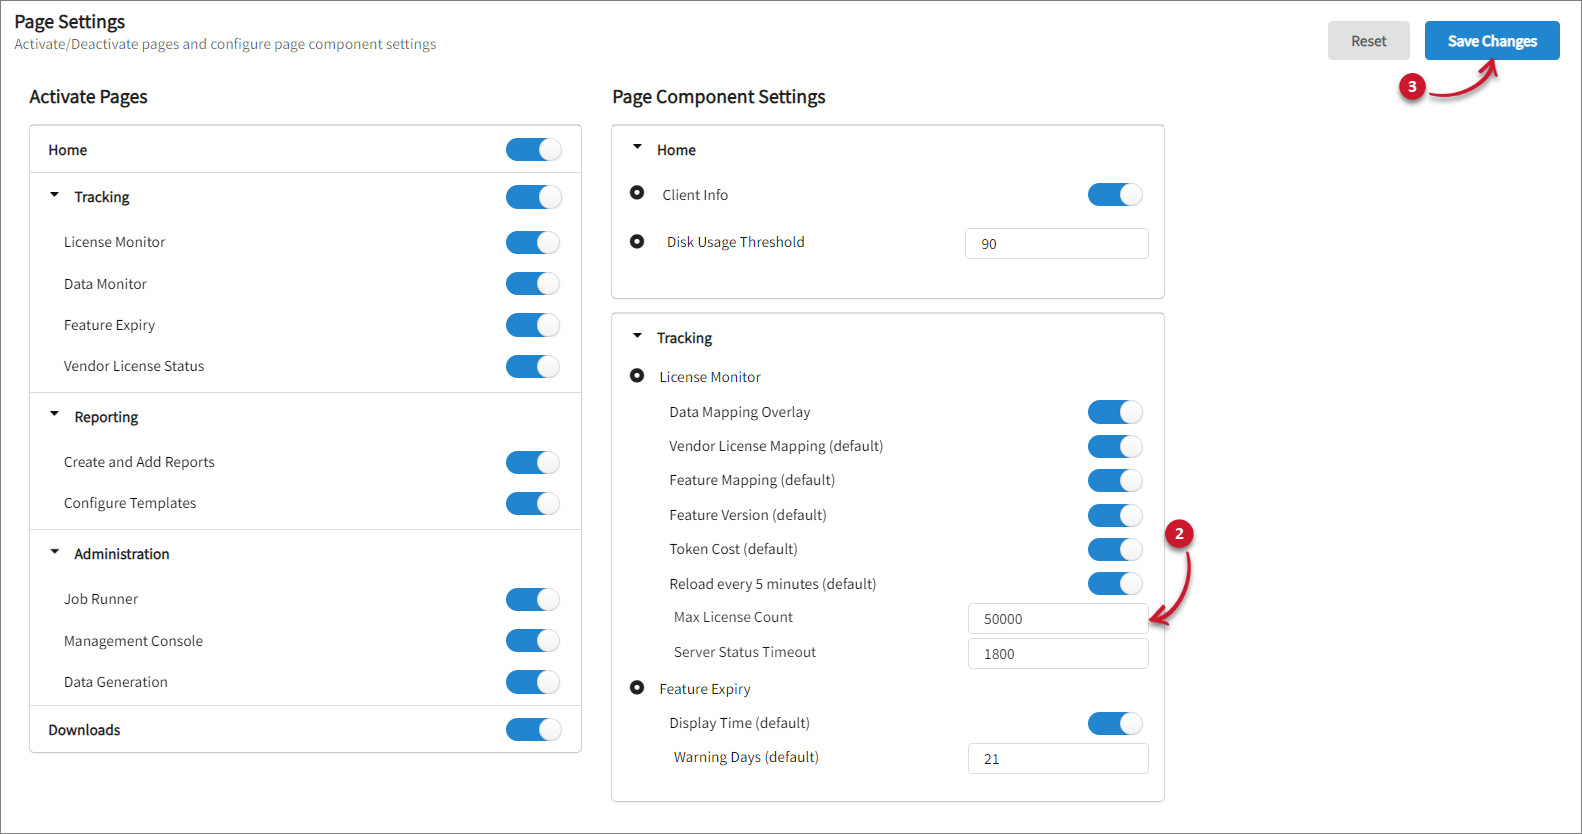 Setting the License Monitor Max License Count
Setting the Server Status Timeout
-
Go to Administration > Settings > Registry.
-
Expand Tracking under Page Component Settings, then set the desired value for Server Status Timeout. The default value is 1800.
-
Click Save Changes.
 Setting the Server Status Timeout
Managing Feature Expiry Page Component Settings
This component cannot be updated if the Feature Expiry registry is disabled.
Displaying Time by Default
-
Go to Administration > Settings > Registry.
-
Expand Tracking under Page Component Settings, then turn on Display Time (default). This displays the time in the Feature Expiry.
-
Click Save Changes.
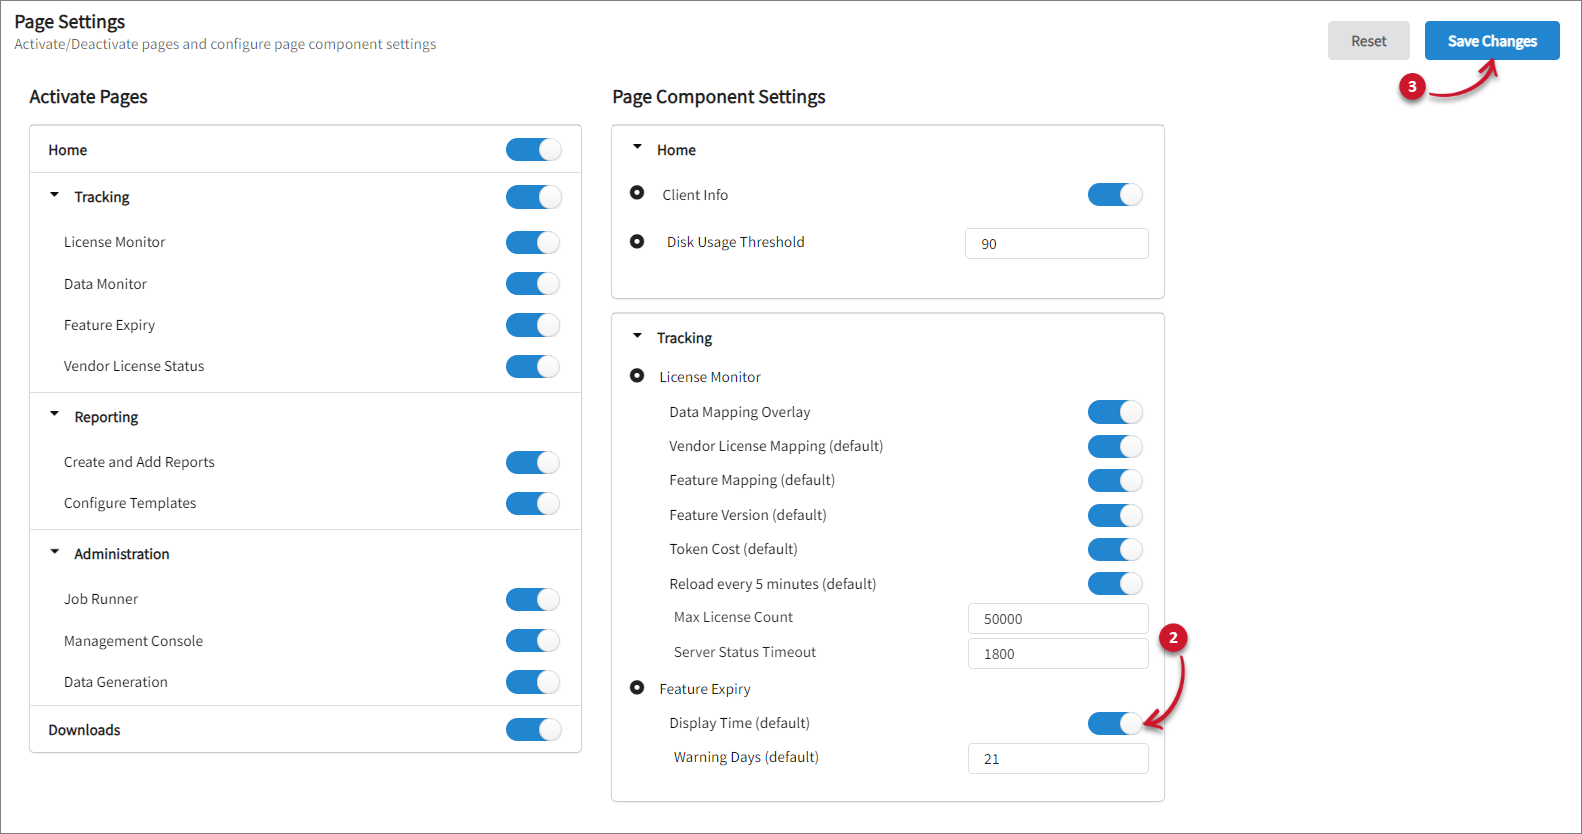 Activating Display Time
Setting the Default Warning Days
-
Go to Administration > Settings > Registry.
-
Expand Tracking under Page Component Settings, then set the desired value for Warning Days. The default value is 21.
-
Click Save Changes.
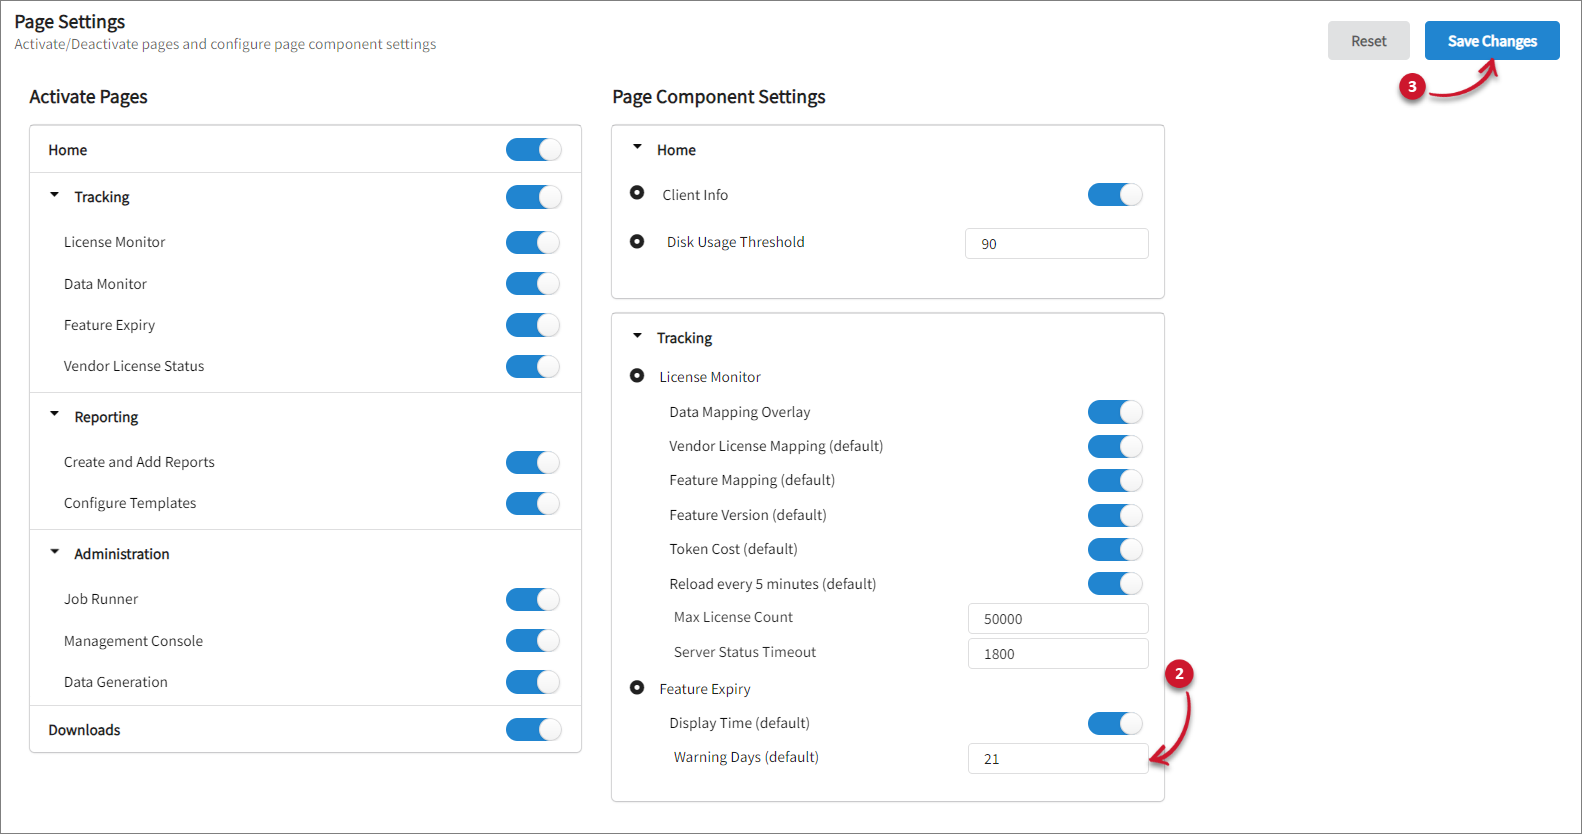 Setting Warning Days