Installation
- Windows
- Unix
- macOS
This guide will walk you through the Core Client installation process based on your setup, whether installing a stand-alone Core Client or activating a Core Client in a Core Server. There are two main categories to make the navigation simple:
Installing through the Windows Interface
-
Double-click the
openit_<version>_client_windows_<architecture>.msiinstaller file to begin.A setup wizard will be displayed. Click Next.
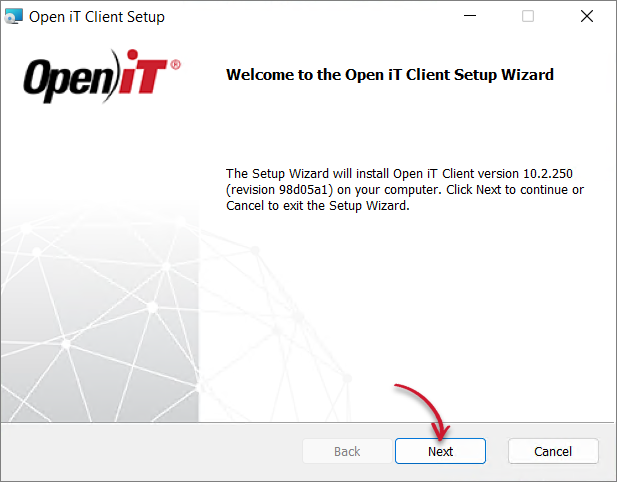
Welcome Screen
-
Read the License Agreement carefully before accepting the terms. Click Next.
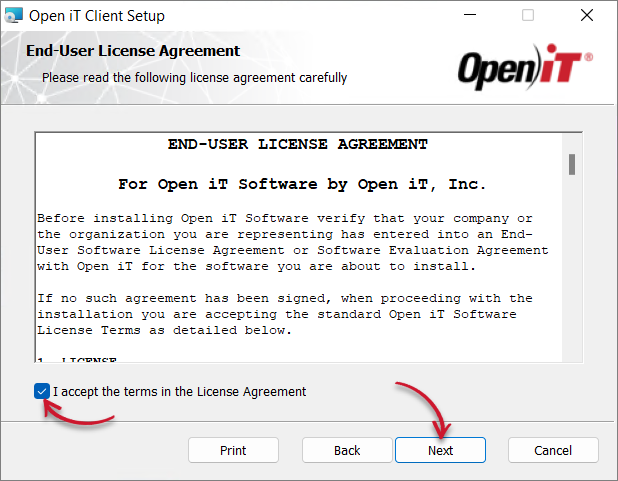
End-User License Agreement
-
Specify where the Core Client will be installed. Click Change to specify a different directory, then click Next.
Clicking Next without doing any changes will use the default installation path.
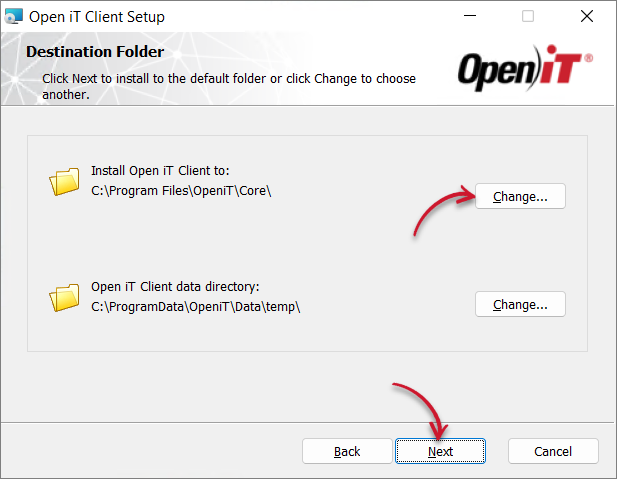
Destination Folder
-
Specify the Uniform Resource Identifier (URI) of the Open iT Ingress. By default, the configured SRV (service) record in the Domain Name System is displayed.
The installer will automatically retrieve the server name and Open iT ports from the URI supplied, assuring that all of the clients are in sync with the same server name and ports used.
Click Next.
noteA trusted server certificate is needed to establish a secure connection between the Open iT client and server.
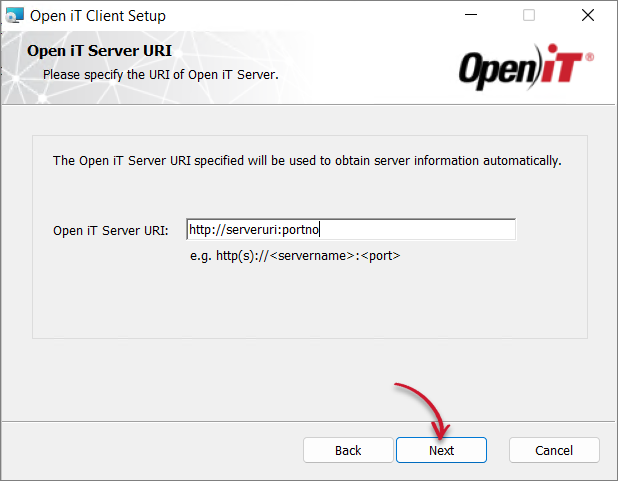
Server URI
If the provided server URI is not available or accessible, a prompt will be displayed. Select Yes to continue or No to return to the server URI dialog.

Inaccessible Server URI
If there are no servers available, provide a server URI and choose to continue with the installation if prompted — the process will continue even if the server URI alias used is not available.
Leaving the server URI text box blank will result in an error.

Blank Server URI Warning
-
On the Ready to Install screen, review the available options and select those that apply:
- Run LicenseAnalyzer Auto Configurators - automatically configures supported license managers (i.e., Flexnet, DSLS, LM-X, LS-DYNA, RLM, and SlickEdit) after installation
- Start Open iT Client Service - starts the Core Client service immediately after installation
- Create a shortcut to the Core Reporter URI on the Desktop. (optional) - adds a convenient desktop shortcut to the server web interface
noteIt is recommended to leave the default options checked for a smoother setup.
If you need to review the entries, click Back.
Click Install to begin the installation.
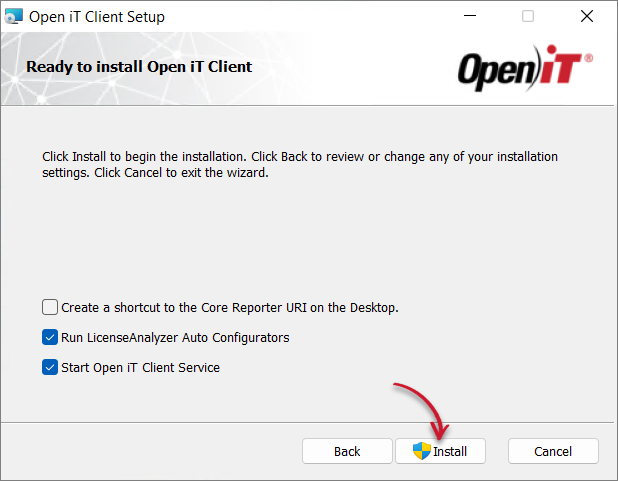
Ready to Install
warningPersonal firewalls (such as ZoneAlarm) may cause problems during startup, and the Open iT service may log additional errors; this may not be critical, but it must be checked to ensure that there are no further errors logged.
-
Click Finish to complete the installation.
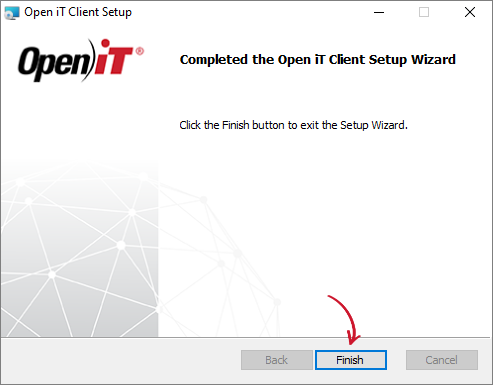
Finish Installation
Installing through the Command Line
-
Open a command prompt with Administrator level privilege.
-
Execute the following command:
Command Syntaxmsiexec /i <msi_file> /l*v <log_file> <options> INSTALLDIR=<root_dir> SERVERURI=http(s)://<ingress_hostname>:<port_number>Required:
Parameter Description /i <msi_file>Use this to specify the path of the Windows installer file, openit_<version>_client_windows_<architecture>.msi./l*v <log_file>Use this to specify the path of the installation log file that will be created during installation. Required Key-Value Pairs for Core Client Installation
Properties:
Parameter Description INSTALLDIR=<root_dir>The path where the Open iT files will be installed. This value is set to C:\Program Files\OpeniT\Coreby default.SERVERURIThe web URI (Uniform Resource Identifier) including the correct port number of the Open iT Ingress. Properties for Core Client Installation
Options:
Parameter Description /quietRun the command in silent mode. /passiveRun the command in unattended mode — progress bar only. Options for Core Client Installation
noteThe installer will use the Windows Installer Interface process when the installation option is not specified.
-
When using the passive mode, wait until the process bar dialog disappears. When using the quiet mode, verify if the installation is complete by opening the Task Manager and checking in the Details tab if the msiexec process is still running.
This guide will walk you through the Core Client installation process based on your setup, whether installing a stand-alone Core Client or activating a Core Client in a Core Server. There are two main categories to make the navigation simple:
Root Software Installation
-
Extract the archive contents of the installer using the following command:
Command Syntaxtar -xvpf openit_<version>_client_<platform>_<architecture>.tarExampletar -xvpf openit_10_2_500_client_linux_x86_64.tarA dist directory will appear in the current directory.
-
Go to the dist directory.
-
Execute the following command:
Command Syntax./install.sh <key1=value1> <key2=value2>...A help command is available for displaying the usage of these key-value pairs. Type
--helpor-hafter the install command.Example./install.sh --helpThe following key-value pairs may be written in any order:
Required:
Parameter Description userUse this to specify the service account name. groupUse this to specify the service account group name. server-uriUse this to specify the Open iT Ingress URL. If the server-uri is not provided, the installer checks the DNS SRV (service) record. If a record is found, the installer will use this and proceed with the installation. If there's no record found, the installation will fail. Required Key-Value Pairs for Core Client Installation
noteUse an existing user and group with root privilege to ensure proper collection.
Optional:
Parameter Description install-dirUse this parameter to specify where the Open iT static data, binaries, and libraries will be. If not specified, the libraries will be in /opt/openitby default. If the default directory doesn't fit the system, use another, and the installer will create a link pointing to this directory. If a link exists from/opt/openit, the link's destination will be suggested as the install destination.
Do not set this to/or/var.temp-dirUse this parameter to specify the directory where the data collected by the Core Clients from the sources will be before transferring them to the Core Server. If not specified, the data will be in /var/opt/openit.Optional Key-Value Pairs for Core Client Installation
Example./install.sh user=openit group=openit server-uri=http://host02:8080noteUsing openit as user and group is optional.
Once started, the
install.shscript will display the following:Example OutputVersion: 10.2.500
Platform: x86_64-unknown-linux
Installer package directory: /home/openit/dist
Host Type: client
Getting information from the given Server URI...
Installation Directory: /opt/openit
Root Temporary Directory: /var/opt/openit
Service Account Name: openit
Service Account Group: openit
Checking minimum OS requirement...
Minimum OS requirement met.
Verifying the directories that will be used by Open iT...
Installing Open iT Client files...
Installing crontab jobs, startup scripts, and boot runlevel links...
Setting the service account as the owner of the installation files...
File ownership setup complete.
Setting up configuration files...
Configuration file setup complete.
Installation successful.
Non-root Software Installation
Non-root software installation is not supported in Solaris.
-
Extract the archive contents of the installer using the following command:
Command Syntaxtar -xvpf openit_<version>_client_<platform>_<architecture>.tarExampletar -xvpf openit_10_2_500_client_linux_x86_64.tarA dist directory will appear.
-
Go to the dist directory.
-
Execute the following command to prepare the required directories needed by the service account before installation:
Command Syntaxsu root -c "./prepare_dirs_and_links.sh <platform> <install_dir> <root_temp_dir> <user> <group>"Examplesu root -c "./prepare_dirs_and_links.sh x86_64-unknown-linux /opt/openit /var/opt/openit openit openit" -
Execute the following command to begin installation:
Command Syntax./install.sh <key1=value1> <key2=value2>...A help command is available for displaying the usage of these key-value pairs. Type
--helpor-hafter the install command.Example./install.sh --helpThe following key-value pairs may be written in any order:
Required:
Parameter Description userUse this to specify the service account name. groupUse this to specify the service account group name. server-uriUse this to specify the Open iT Ingress URL. If the server-uri is not provided, the installer checks the DNS SRV (service) record. If a record is found, the installer will use this and proceed with the installation. If there's no record found, the installation will fail. Required Key-Value Pairs for Core Client Installation
Optional:
Parameter Description install-dirUse this parameter to specify where the Open iT static data, binaries, and libraries will be. If not specified, the libraries will be in /opt/openitby default. If the default directory doesn't fit the system, use another, and the installer will create a link pointing to this directory. If a link exists from/opt/openit, the link's destination will be suggested as the install destination.
Do not set this to/or/var.temp-dirUse this parameter to specify the directory where the data collected by the Core Clients from the sources will be before transferring them to the Core Server. If not specified, the data will be in /var/opt/openit.Optional Key-Value Pairs for Core Client Installation
Example./install.sh user=openit group=openit server-uri=http://host02:8080noteUsing openit as user and group is optional.
Once started, the
install.shscript will display the following:Example OutputVersion: 10.2.500
Platform: x86_64-unknown-linux
Installer package directory: /home/openit/dist
Host Type: client
Getting information from the given Server URI...
Installation Directory: /opt/openit
Root Temporary Directory: /var/opt/openit
Service Account Name: openit
Service Account Group: openit
Checking minimum OS requirement...
Minimum OS requirement met.
Verifying the directories that will be used by Open iT...
Installing Open iT Client files...
Installing crontab jobs, startup scripts, and boot runlevel links...
The startup scripts and boot scripts have to be installed by root.
An administrator should install the startup scripts and the boot
script links.
############ IMPORTANT #############
Do not forget to inform the Administrator to copy the scripts
located at:
/opt/openit/libexec/bin/openit-handlerd
/opt/openit/libexec/bin/openit-scheduler
into the system's startup script directory.
/etc/rc.d/init.d
then create a symlink to each current runlevel.
Setting the service account as the owner of the installation files...
File ownership setup complete.
Setting up configuration files...
Unable to create file: Permission denied
Unable to start accounting on file /var/account/pacct: Operation not permitted
Configuration file setup complete.
runuser: may not be used by non-root users
Installation successful.
This guide will walk you through the Core Client installation process based on your setup, whether installing using the installer interface or not. There are two main categories to make the navigation simple:
Installing through the Installer Interface
-
Double-click the
openit_<version>_client_mac.pkgfile. Click Continue to proceed with the installation.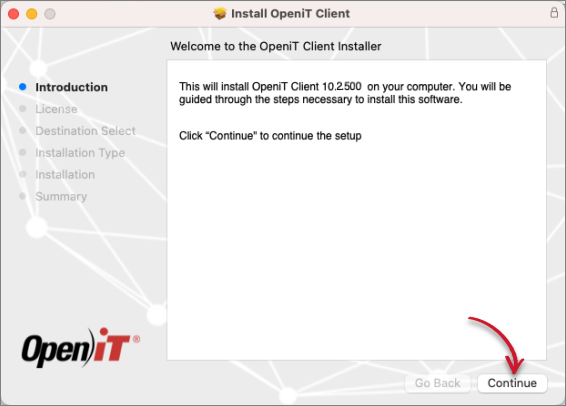
Welcome Screen
-
Read the License Agreement carefully.
Click Continue to resume the installation.
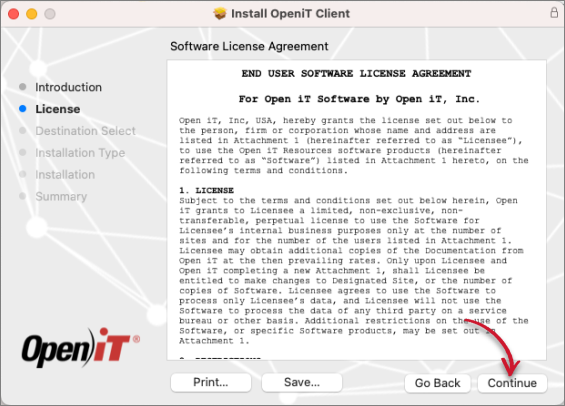
End-User License Agreement
A pop-up will appear.
-
Agree to the terms of the software license agreement by clicking Agree.
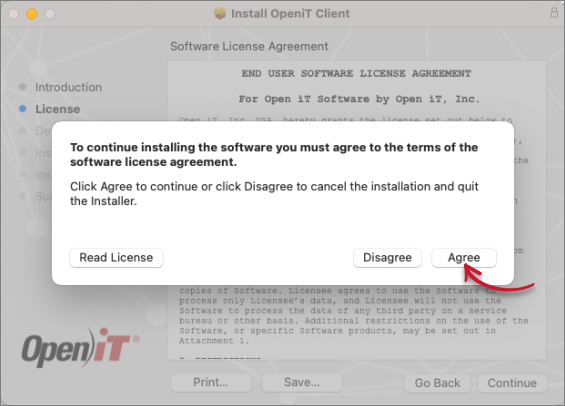
Agree End-User License Agreement
-
Click Install.
warningYou can only install Open iT in the root directory.
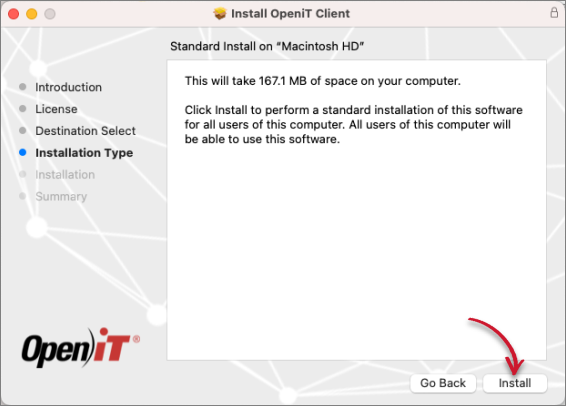
Installation Type
A pop-up will appear.
-
Key in the User Name and Password, then click Install Software.
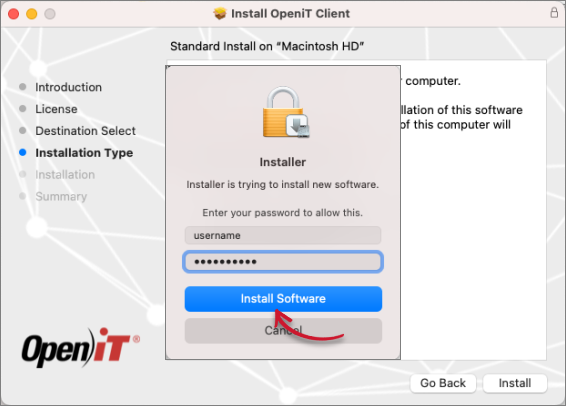
Install Software
-
The installer sets up all necessary files on the computer. Click Close after completing the installation.
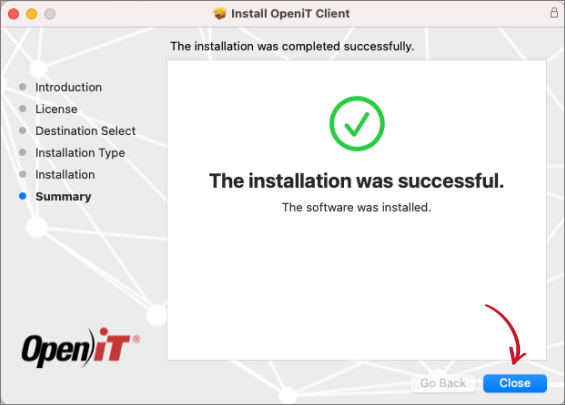
Installation Complete
Establishing Connection to the Server
On macOS, the Core Client requires additional steps to establish a secure connection to the server if you installed it using the installer interface.
-
Open a terminal.
-
Execute the following command:
Command Syntaxsudo /usr/local/openit/bin/ serverurl <server_url>where
<server_url>is the Open iT Server URL.
Running this command outputs a warning message if the server URL is not available or accessible. Enter y to continue and provide the server URL at a later time or n to exit the setup.
Installing through the Terminal
-
Open a terminal.
-
Execute the following command:
Command Syntaxsudo installer -pkg <pkg_file> -target <tgt_vol> && sudo /usr/local/openit/bin/ serverurl <server_url>Required:
Parameter Description -pkgUse this parameter to specify the full path to the mac installer file, openit_<version>_client_mac.pkg.-targetUse this parameter to specify the volume where the Core Client will be installed. <server_url>Use this property to specify the Open iT Ingress URL with the following format: http(s)://<ingress_hostname>:<port_number>
where:
<ingress_hostname>- hostname of the machine with Ingress installation<port_number>- port number used by the Apache web service; this is specified upon Ingress installation
Required Key-Value Pairs for Core Client Installation
warningYou can only install Open iT in the root (
/) directory.Examplesudo installer -pkg openit_10_2_500_client_mac_x64.pkg -target / && sudo /usr/local/openit/bin/ serverurl https://win-host02:8080Once started, it will display the following:
Example Outputinstaller: Package name is OpeniT Client
installer: Installing at base path /
installer: The install was successful
Activating Core Client in the Core Server (for coexistence)
Apply the configurations shown in the Open iT Core Server.
Open iT allows for a coexistent environment wherein both server and client is hosted on a single machine.
These are the required steps to activate server-client coexistence:
- Windows
- Unix
-
Open a command prompt with Administrator level privileges.
-
Go to the bin directory, which is by default in
C:\Program Files\OpeniT\Core\bin, run the command:Command Syntaxcd <bin_dir>Examplecd C:\Program Files\OpeniT\Core\bin -
Once in the directory, activate the Core Client, run the following commands:
Command Syntaxopenit_oconfinit -u "core_config-client.root.scheduler.jobs.core_download_dist.general.active=true"Command Syntaxopenit_oconfinit -u "core_config-client.root.scheduler.jobs.core_moduleactivator.general.active=true" -
Open Task Manager and go to the Services tab.
-
Restart the OpeniTServer service.
This will activate the scheduler jobs of client modules set to true in the module-activation directory, which is by default in
C:\Program Files\OpeniT\Core\Configuration\module-activation.Another option to configure coexistence in Windows is to run the
openit_moduleactivator. Go to the bin directory, which is by default inC:\Program Files\OpeniT\Core\bin, and run the following in the command line:Command Syntaxopenit_moduleactivator --no-restart
-
Go to the bin directory, which is by default in
/opt/openit/bin, run the command:Command Syntaxcd <bin_dir>Examplecd /opt/openit/bin -
Once in the directory, activate the core client, run the following commands:
Command Syntax./openit_oconfinit -u "core_config-client.root.scheduler.jobs.core_download_dist.general.active=true"Command Syntax./openit_oconfinit -u "core_config-client.root.scheduler.jobs.core_moduleactivator.general.active=true" -
Run the command to restart the Open iT services:
Example./openit-all restartThis will activate the scheduler jobs of client modules set to true in the module-activation directory, which is by default in
/var/opt/openit/etc/module-activation.Alternatively, you can apply configuration changes without restarting the Open iT services. To do so, run the following:
Command Syntax./openit_moduleactivator --no-restart