License Monitoring
The License Monitor or Monitor page contains the real-time display of all monitored license servers.
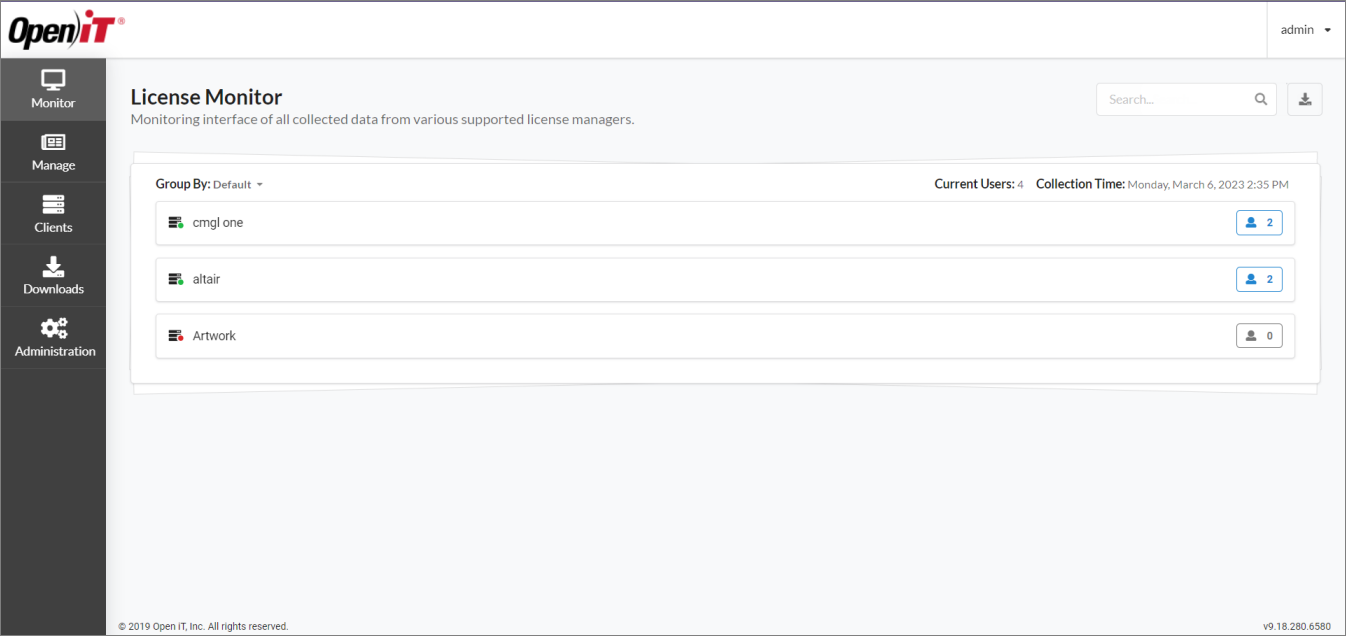
Just like in the License Managers page, the status of the detected vendors are identified as follow:
- Green - the vendor daemon is up; the client is connected to the server
- Yellow - the files are not updated for more than two (2) hours
- Red - the vendor daemon stopped; the client can either be disconnected or connected to the server
- Gray - the vendor daemon is up (last known); client is disconnected to the server
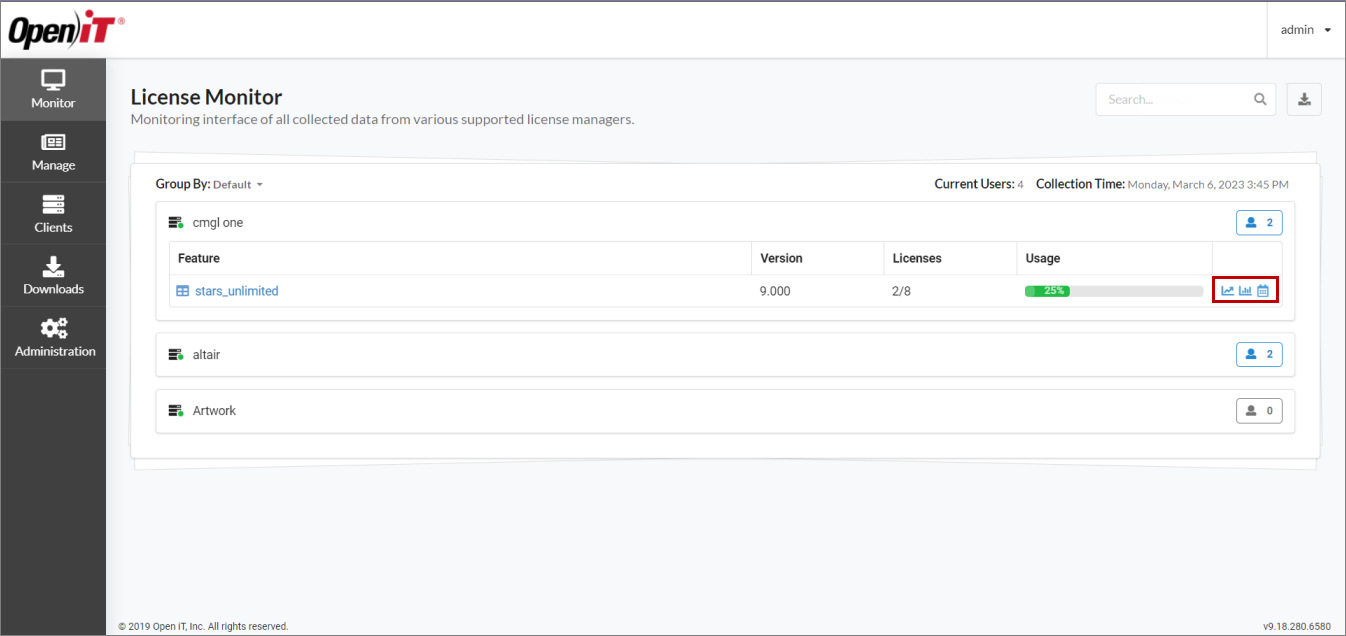
Click on the vendor to see the features under it.

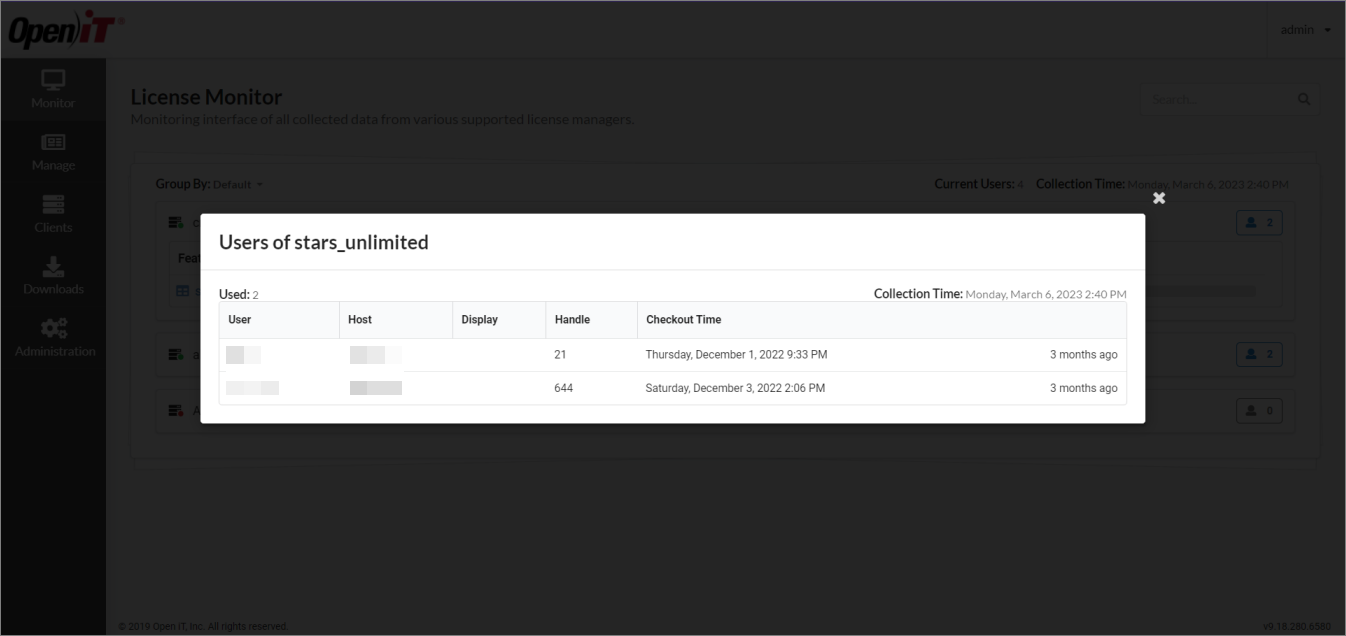
Click a feature to view its users.
Enable the License Monitor Page
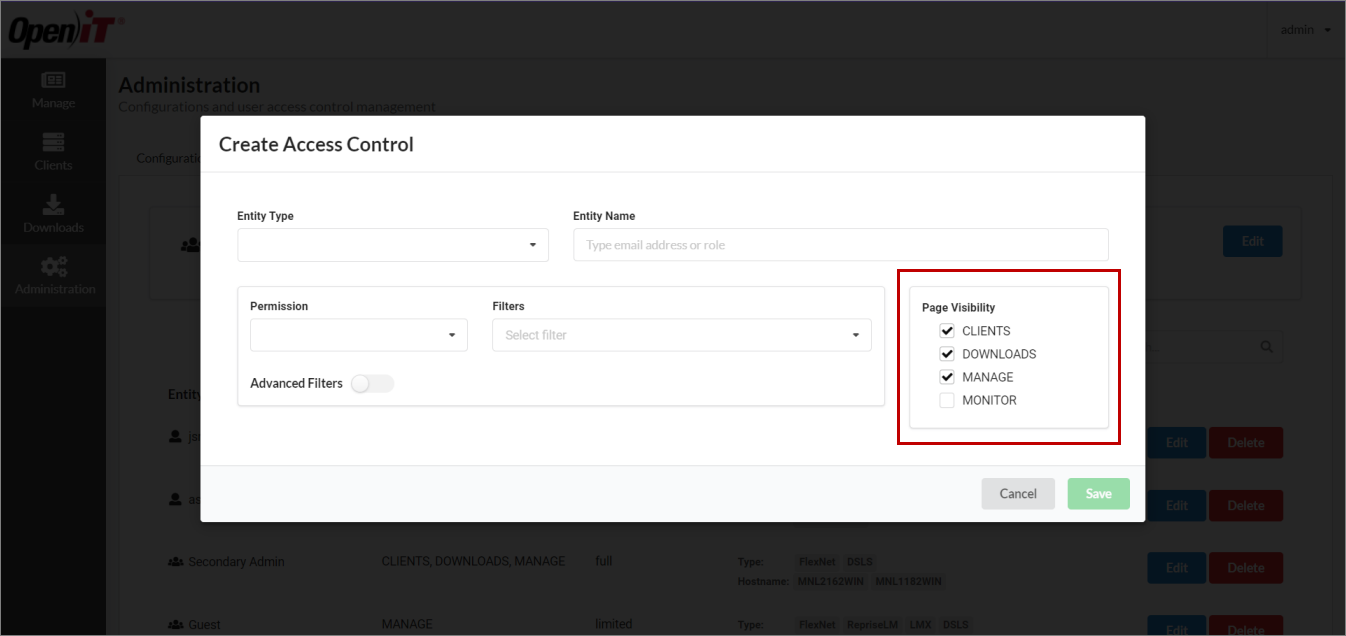
Administrators can allow an access control to navigate to the Monitor page through the Page Visibility option.
However, by default, the Page Visibility list does not include the Monitor page.
To add Monitor to the Page Visibility list in Administration > Access Controls:
-
Go to the Configuration folder, which is
C:\Program Files\OpeniT\Zero\Configurationby default. -
Create a copy of
FeatureControl.jsonand rename the duplicate file toFeatureControl.Override.json.Open the existing
FeatureControl.Override.json, if there is already one. -
In the override file, under Monitor, set Visible to true for RoleBasedPageAccessFilter.
FeatureControl.Override.json{
"FeatureControl": {
"Monitor": {
"EnabledFor": [
{
"Name": "RoleBasedPageAccessFilter",
"Parameters": {
"Visible": true
}
} -
Save the file.
For administrators, the Monitor page immediately becomes available in the CLIMS web interface after enabling.
After updating the file, Administrators can proceed with Managing Access Controls to grant access to the Monitor page.
Export Data from the License Monitor
-
Click
 Export.
 -
Choose whether to Export as CSV or Export as Excel File.
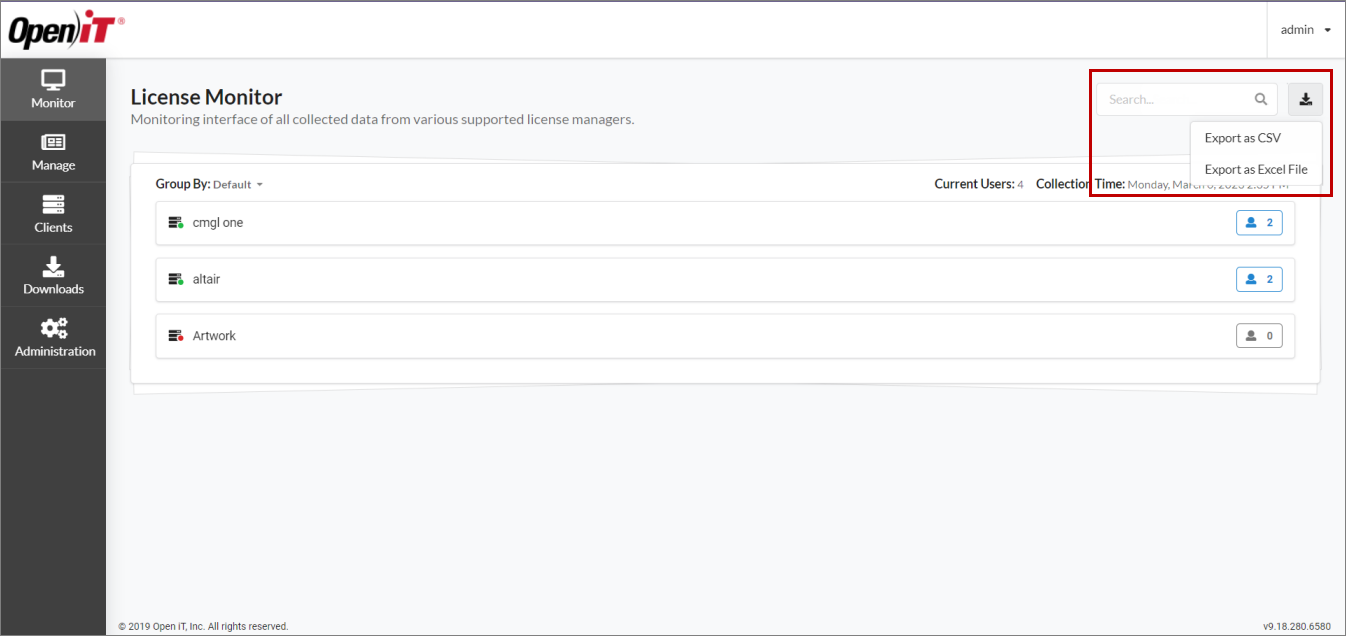 Export Selection
You can also filter the data to export based on the inputs in the Search bar.
For example, if you want to export the license monitor data from a specific vendor, input the vendor name in the Search bar, then export as preferred.
View Quick Reports
The Monitor page also displays quick reports, such as Utilization Trend, License Efficiency, and Heatmap.
However, by default, quick reports are disabled.
To display the quick reports in the Monitor page:
-
Log in using an Administrator account.
-
Go to Administration > Configurations.
-
Select Configurations/DataManagement from the list of available configuration files.
-
Set the value of ProcessData to True.
-
Click Save.
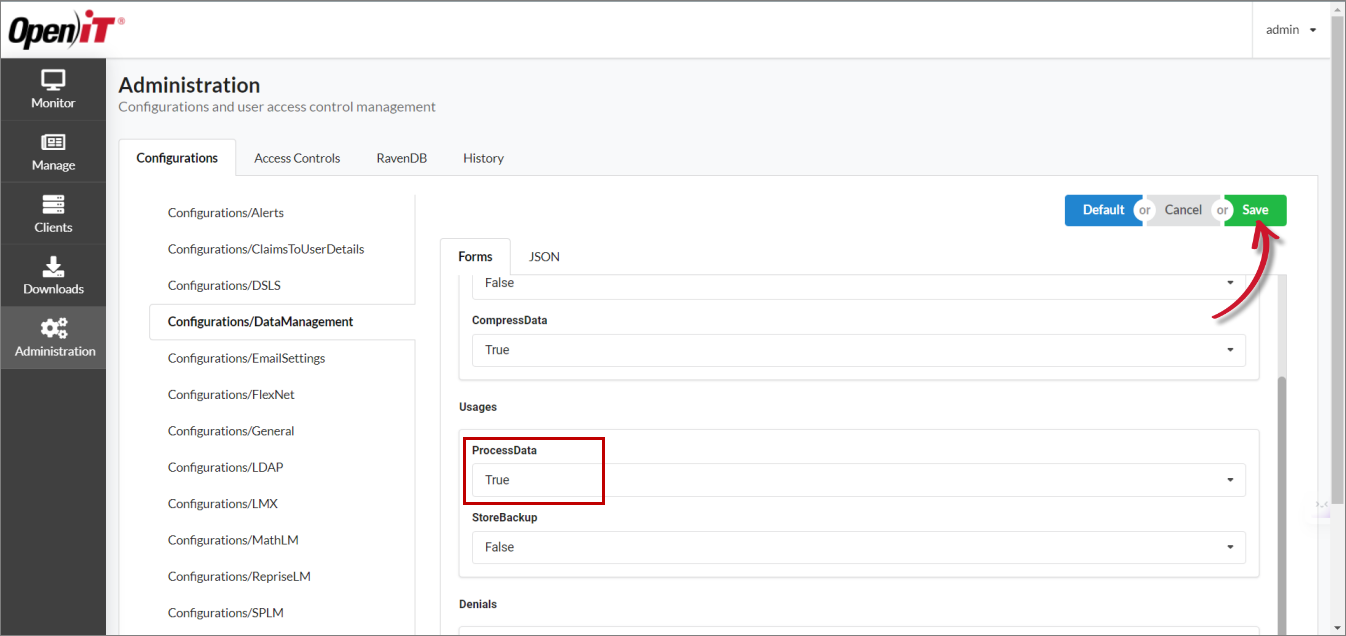 Saving Configurations/DataManagement
To verify, log in using an account with access to the Monitor page.
Click on a vendor and the quick reports icons should be visible right next to the Usage column.