Configure Mapping Sources
Adding Alias to Destination Fields
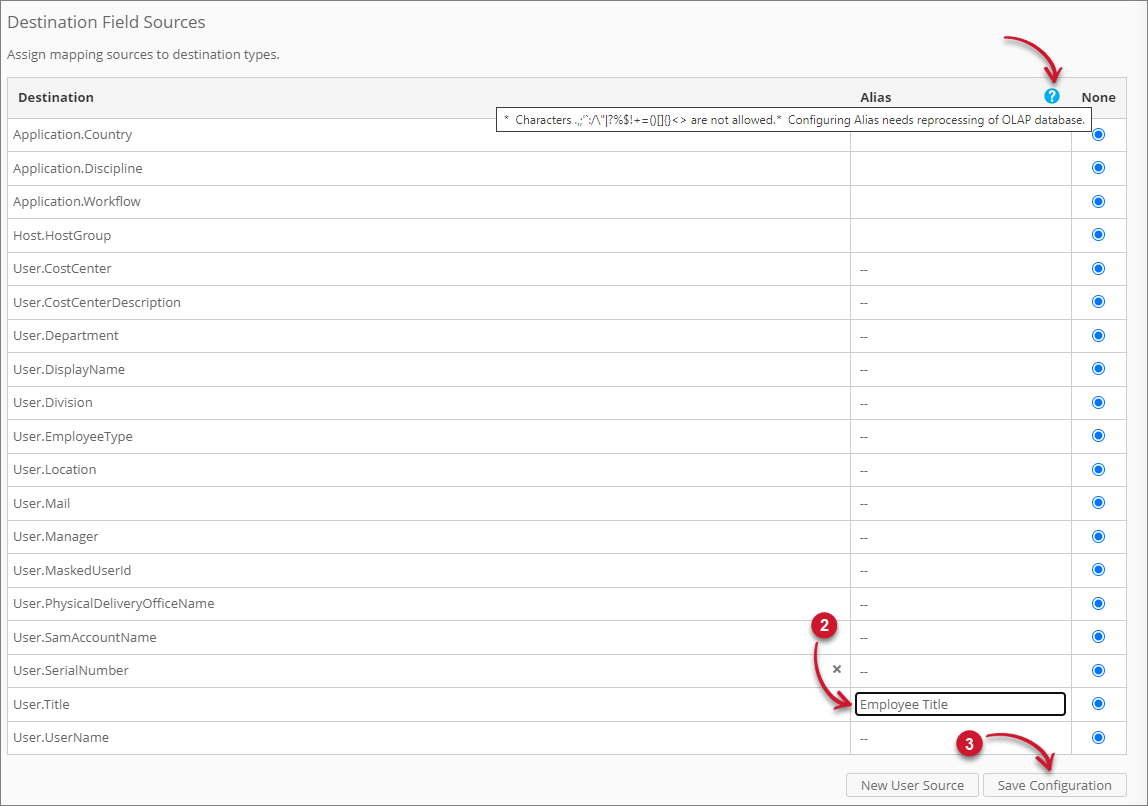
Alias is used to replace the static name of the destination field. This is to customize the fields in reporting. Follow these instructions to add alias:
-
Look for the field to assign an alias from the Destination Fields Sources table.
-
Click the Alias column of the field to assign. This should transform into a textbox.
Type the desired alias.
NOTEHover the question mark icon to see some limitations in setting the alias.
-
Click the Save Configuration button to apply the changes.
 Adding Alias to Destination Fields
 -
Reprocess the OLAP database using the command OpeniT.Server.Etl.Console.exe ProcessOlap with the Analysis Server console application.
-
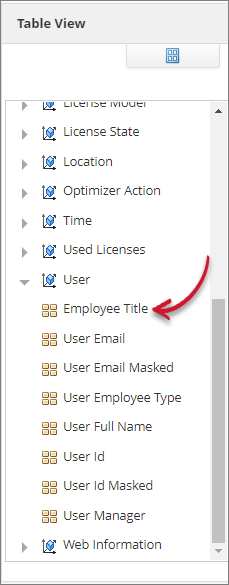
After a successful reprocessing, verify if the aliasing is successful through the Analysis page and expanding the User dimension in the Pivot Table Fields.
The aliased attribute should be present.
 Aliased Destination Fields
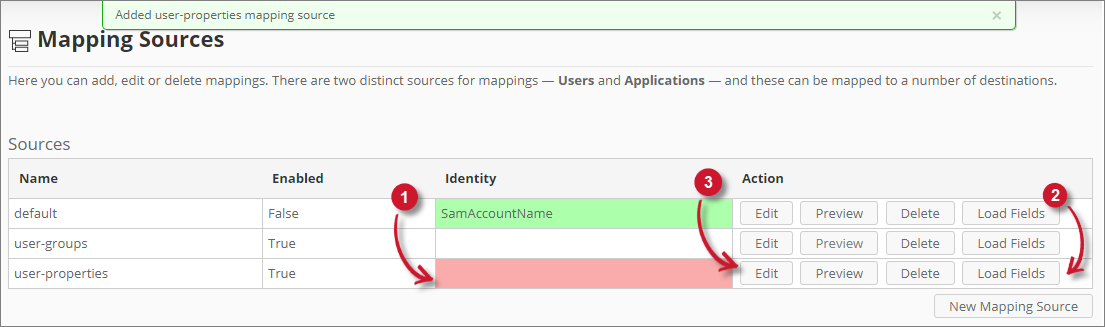
Editing a Mapping Source
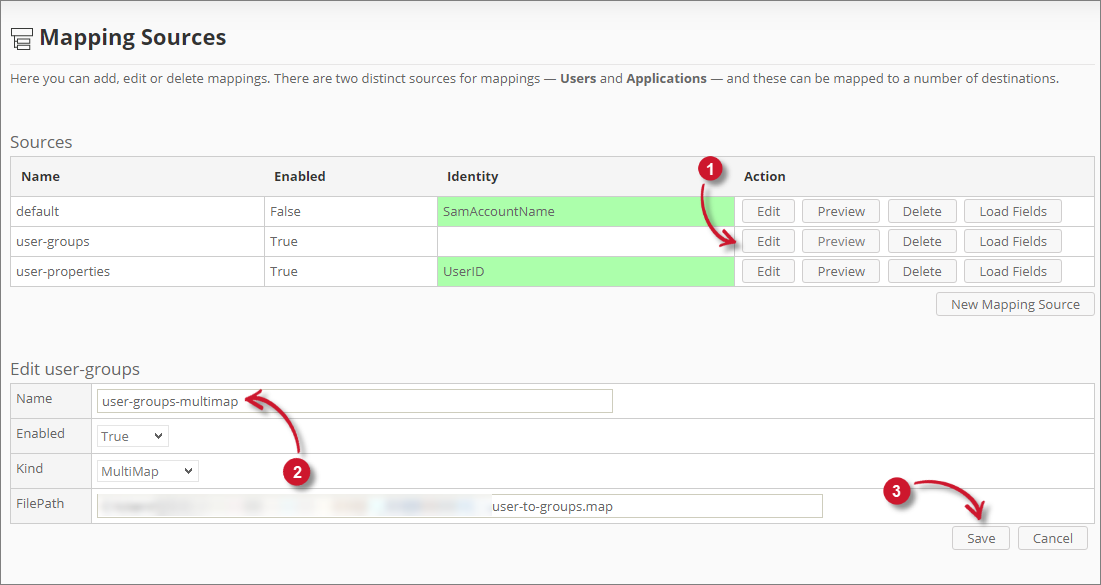
Follow these instructions to edit a mapping source:
-
Look for the mapping source to edit.
The edit pane should appear containing the details of the mapping source.
-
Modify the details as needed.
-
Click Save to apply the changes.
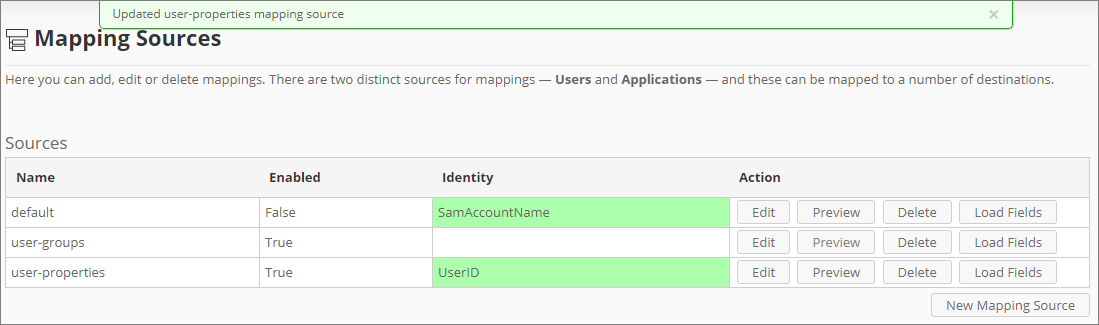
 Editing Mapping Sources
A notification message should appear at the top of the page and the sources list should automatically be updated.
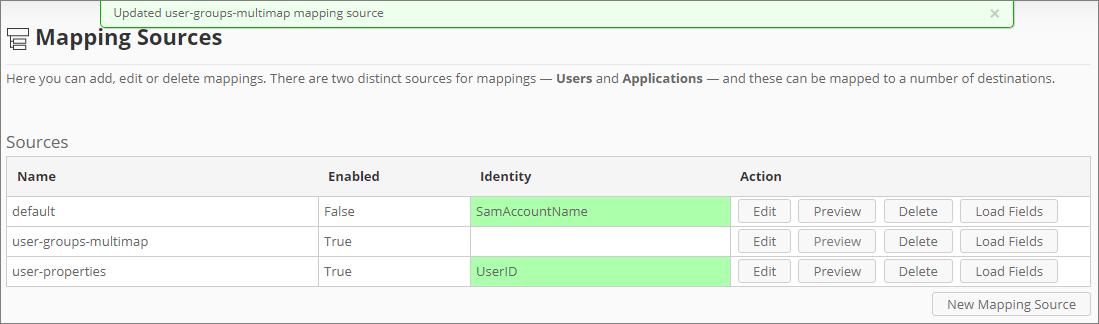 Edited Mapping Sources
Populating the Identity Field
This option is only available for CSV mapping sources.
Follow these steps to populate the Identify Field option:
-
After saving the mapping source, notice that the Identity column is red.
-
Click Load Fields of the created mapping source.
-
Click Edit. The Identity Field will be populated with column values.
-
Choose among the values.
-
Click Save to apply the changes.
 Save Identity Mapping Source - CSV
A notification message will appear at the top of the page and the sources list will be updated with the chosen identity.
 Saved Identity Mapping Source - CSV