Configuring SMTP Settings
Use this to provide configurations for Simple Mail Transfer Protocol (SMTP) for sending email alerts. Follow these instructions to properly setup the configuration:
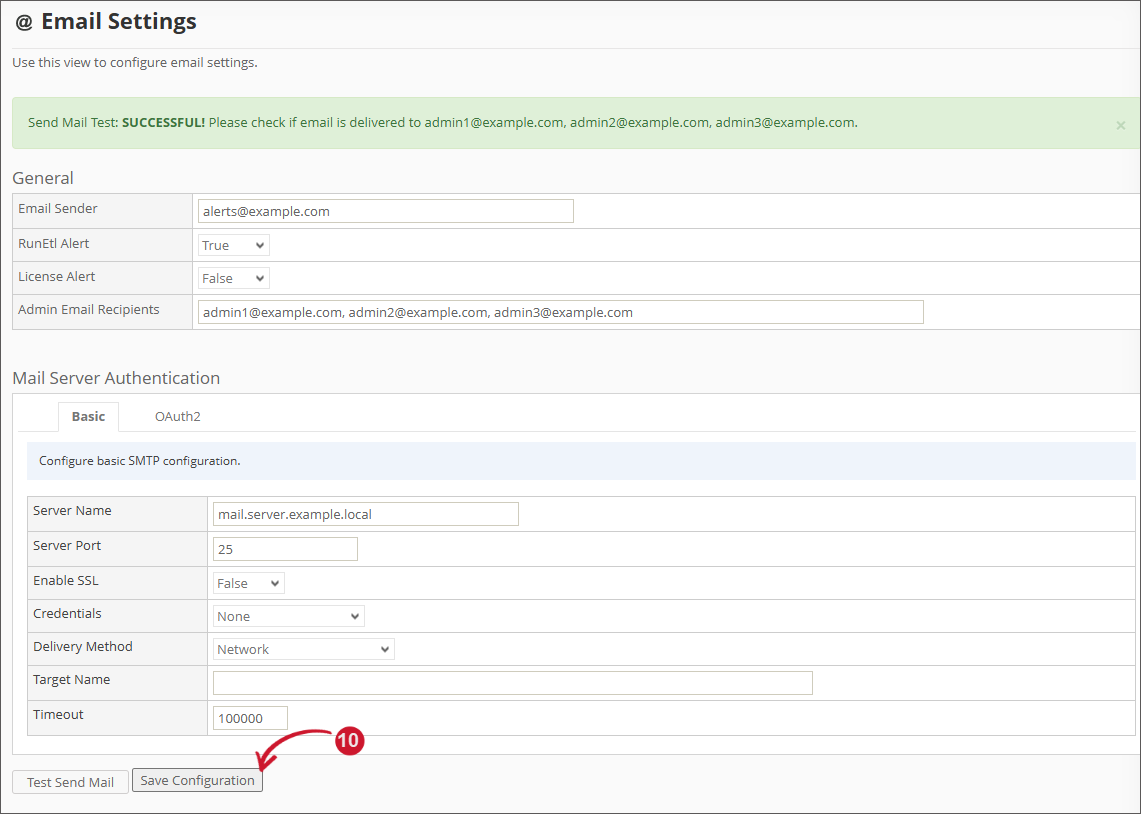
Make sure that the General Settings are properly configured.
-
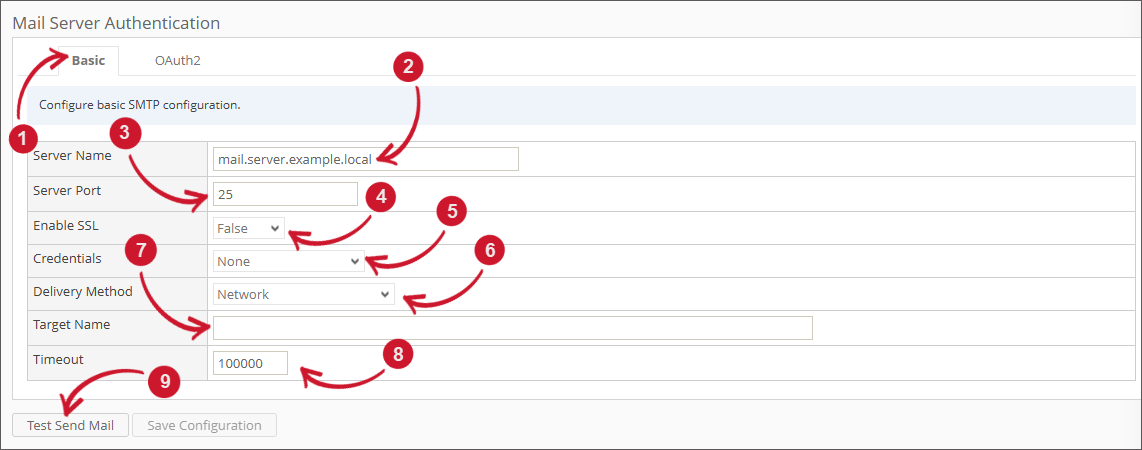
Make sure you are in the Basic tab.
-
Provide the valid hostname or IP address in the Server Name field.
-
Provide the valid and open SMTP port number in the Server Port field. The default value is 25.
-
Set the Enable SSL option to True to enable or False to disable the sending of email through Secured Socket Layer (SSL).
-
Choose among the Credentials options to use for authenticating the sending of email messages.
Credentials Description None Use this to send email messages without authentication. Custom Use this to authenticate with a valid Username and Password. Default Credentials Use this to authenticate with the System.Net.Credentials.DefaultCredentials of the Analysis Server application. Service Account Use this to authenticate using the credentials of the service account running the application. Email Settings Credentials
-
Choose among the Delivery Method options to use when delivering email alerts.
Method Description Network Use this to send email messages through the network to an SMTP server. SpecifiedPickupDirectory Use this to copy email messages to a specified pickup directory location. PickupDirectoryFromIis Use this to copy email messages to the pickup directory used by a local Internet Information Services (IIS) instance for delivery. Email Settings Delivery Method
-
Specify the Service Provider Name (SPN) used for authentication when the SMTP server uses extended protection or has a relay server in the Target Name field. This is optional.
-
Provide the amount of time the process of sending email messages calls a timeout in the Timeout field. The default value is 100000 seconds.
-
Click the Test Send Mail to test the provided configuration.
Wait until the validation message appears.
 Test Send Mail
The recipients configured should receive a test mail.
 Test Mail Sent
-
When successful, click the Save Configuration button to save the settings.
Wait for the confirmation message to appear.
 Save Configuration