Manage Vendors
Adding a Record
-
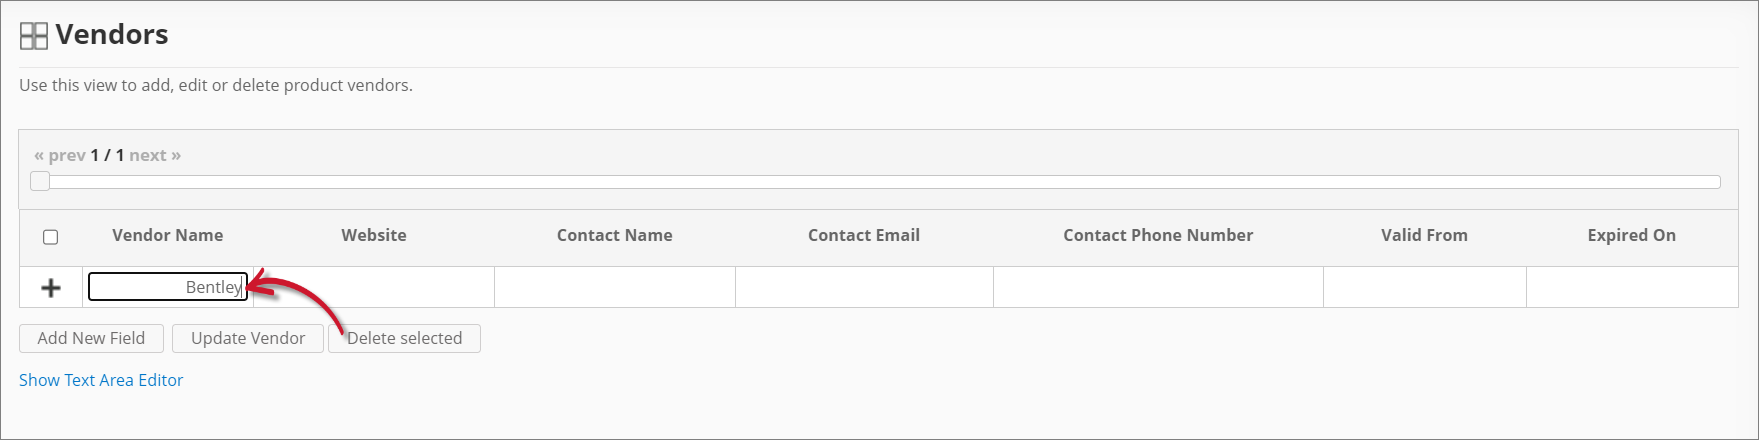
For the Vendor Name, Website, Contact Name, Contact Email, and Contact Phone Number columns, click the corresponding empty cell to transform it into a text editor.
-
Type in the value.
 Adding a Record
 -
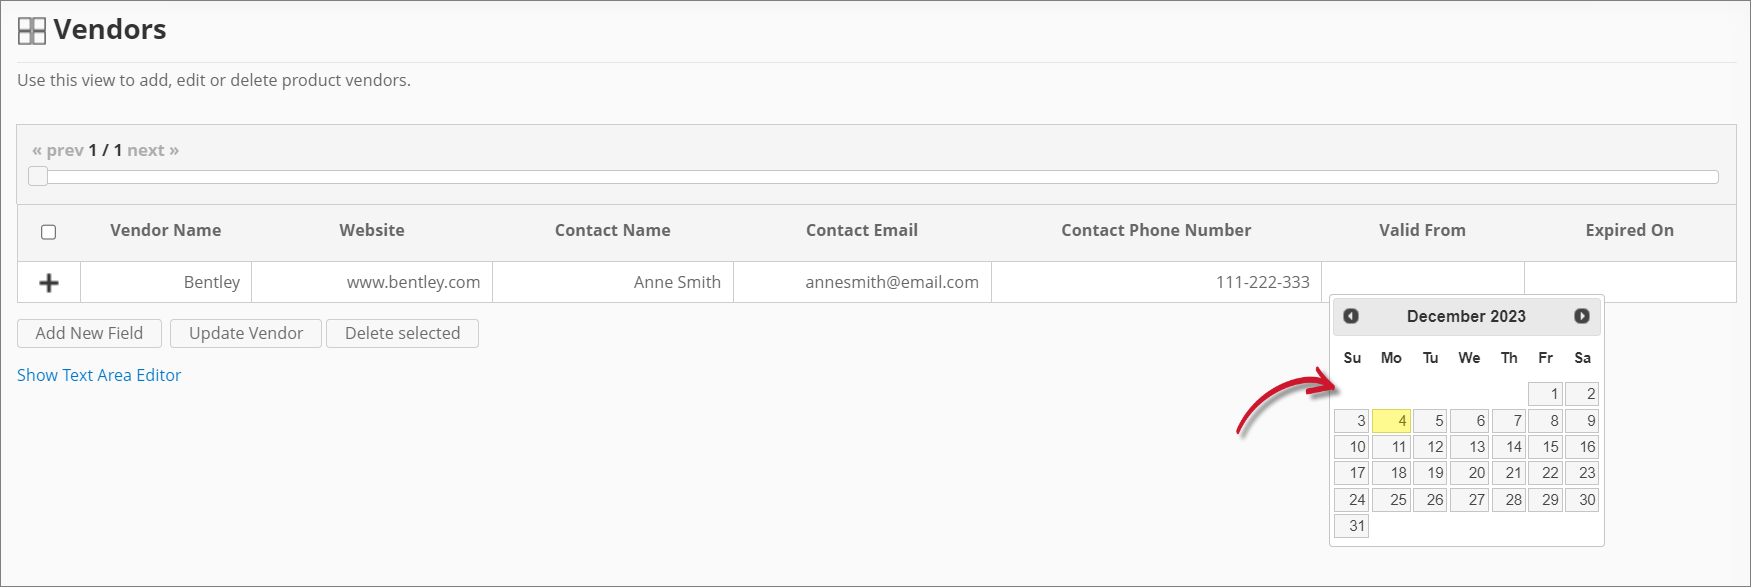
For the Valid From and Expired On columns, choose the date range for the validity of the vendor.
 Adding the Validity
 -
Click the add icon to add the record.
 Saving a Record
Adding a New Field
You may add new columns as needed to include more vendor details.
-
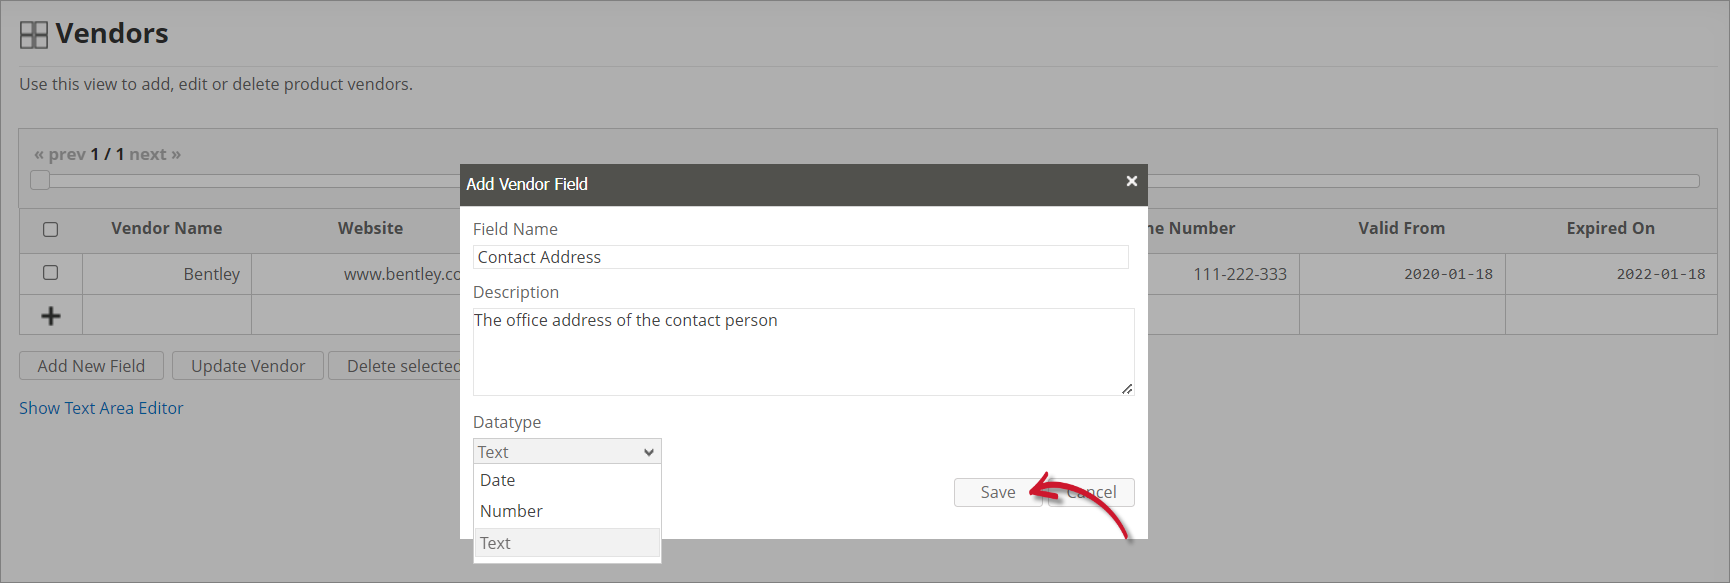
Click Add New Field at the bottom of the table.
 Adding a New Field
 -
Provide the following details:
Details Description Field Name A descriptive name of the field. Description A brief description of the field. Datatype The type of data that the field accepts. New Field Details -
Click Save.
 Saving the New Field
The Vendors table should include the newly added column.
 New Field
Updating a Record
-
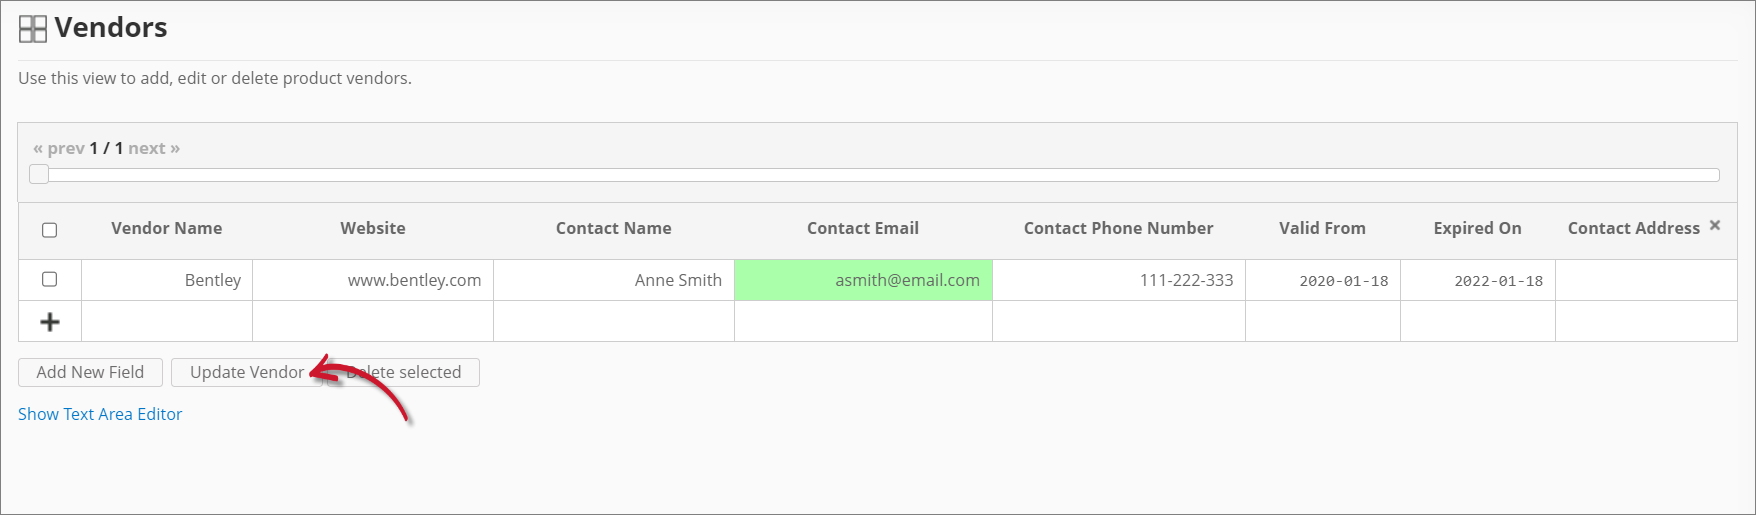
Click the cell you want to update, then modify the value as needed.
-
Click Update Vendor at the bottom of the table.
 Updating a Record
Deleting Records
-
Click the corresponding checkbox of the record(s) you want to delete.
-
Click Delete selected at the bottom of the table.
-
Choose OK on the confirmation prompt to continue.
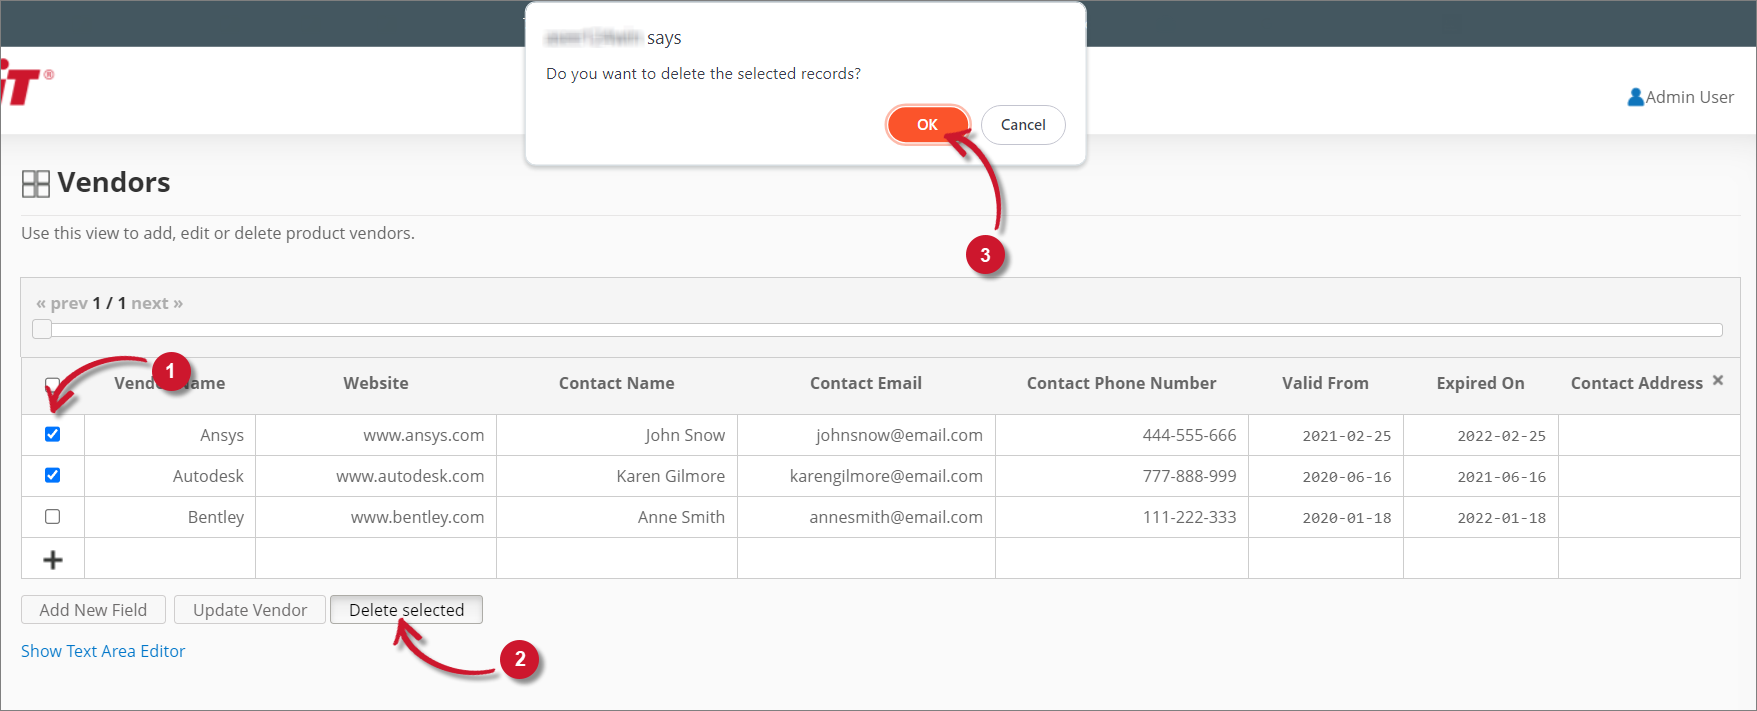 Deleting Records
Maintaining the Vendors Table using Excel Sheets
It is best practice to maintain vendor information using Excel, where you can have file backup, versioning, and better team collaboration.
Your Excel sheet can follow the generic vendors table format defined in the Vendors table in Analysis Server or a customized template, where you have to make sure that the custom field(s) are added in the Vendors table in Analysis Server.
-
Open the Excel file and go to the worksheet containing vendor information.
-
Update the vendor information as needed, then save the Excel file.
-
Copy the entire content of the worksheet.
warningDo not copy the column headers.
 Sample Excel Sheet
 -
Go to Administration > Contract Management > Vendors in Analysis Server.
-
Click Show Text Area Editor.
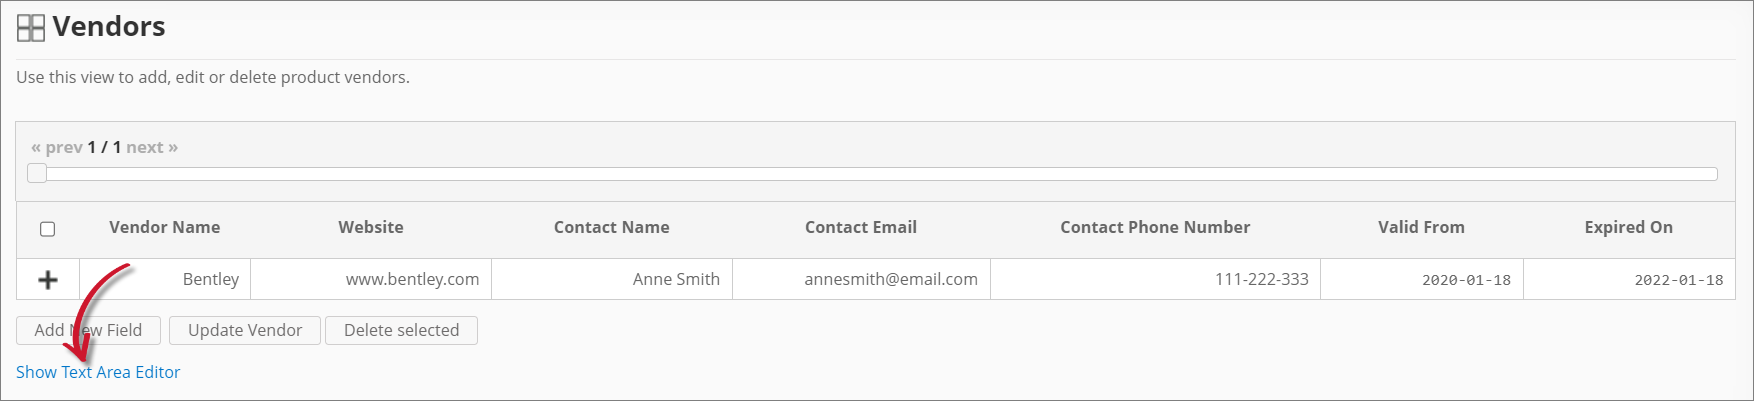 Show Text Area Editor
If there are already entries in the Vendors table, click Populate Text Area to display the existing vendor information in the text area editor.
-
Paste the copied content in the text area editor.
If there are already existing entries, it's best to replace them entirely with the freshly copied data.
-
Specify the proper Delimiter, Format, and Quote.
infoFor Excel worksheets, the Delimiter value is
{TAB}. -
Click Commit to save.
-
Choose OK on the confirmation prompt to continue.
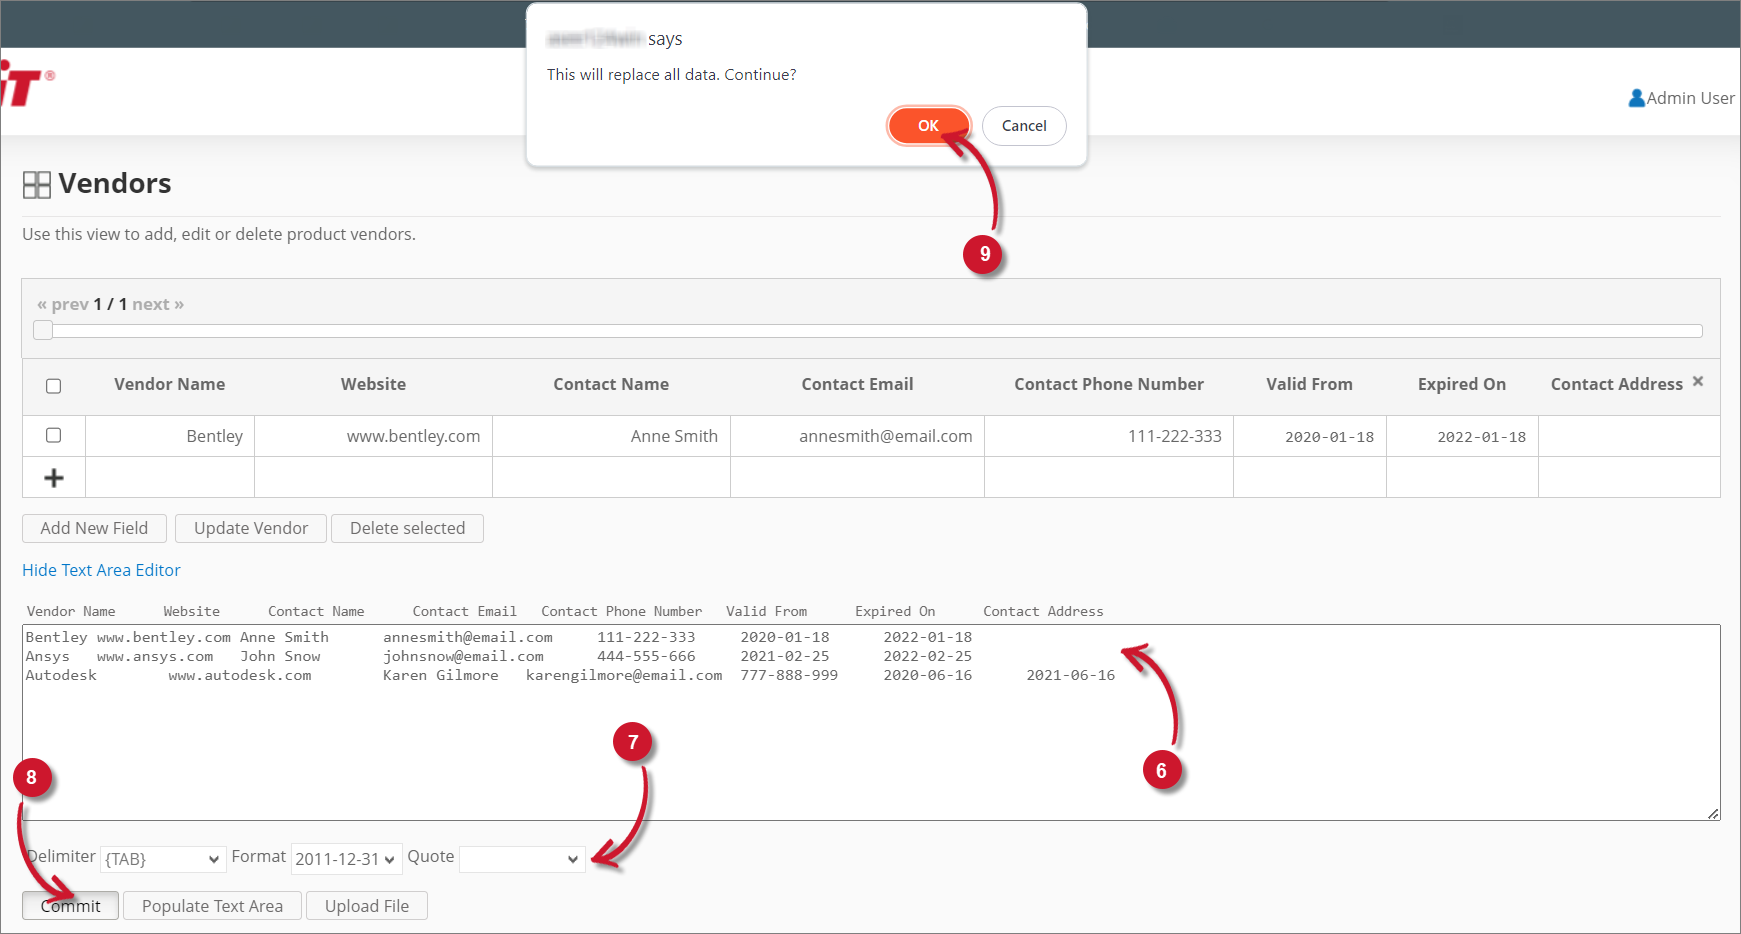 Using the Text Area Editor