Configuring On-premises Data Gateway
On-premises Data Gateway facilitates a secure and efficient communication between cloud services and on-premises data sources. This section guides you in setting up an on-premises data gateway.
Installing On-premises Data Gateway
To install the On-premises Data Gateway, follow the steps below:
-
Visit the designated download location to acquire the Power BI Gateway (Standard).
-
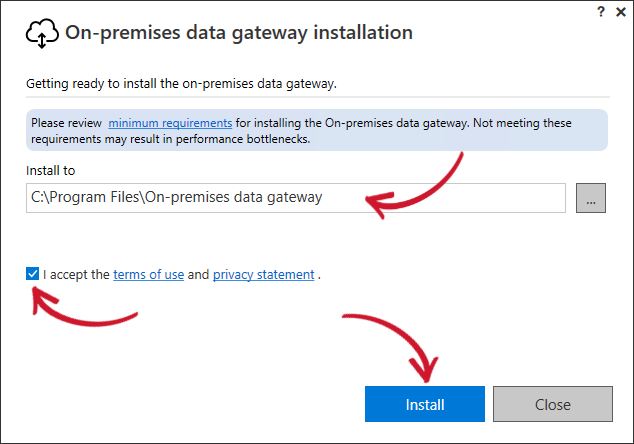
Execute the installation process by running the downloaded file. Select the directory where you want to install the On-premises data gateway. Click the checkbox to accept the terms of use and carefully review the privacy statement. Click Install to start the installation process.
 On-premises Data Gateway Installation
Wait for the installation process to finish.
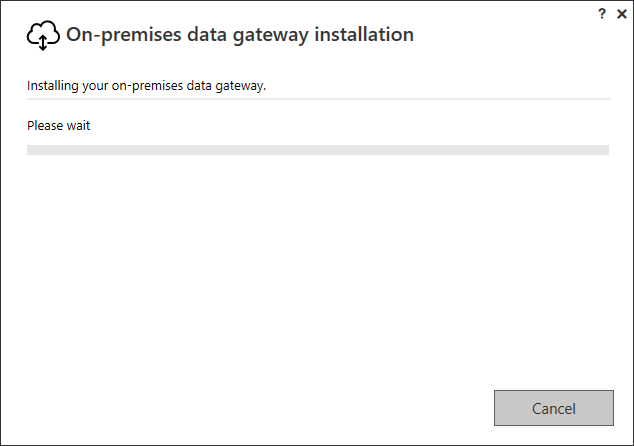 On-premises Data Gateway Installation in-progress
 -
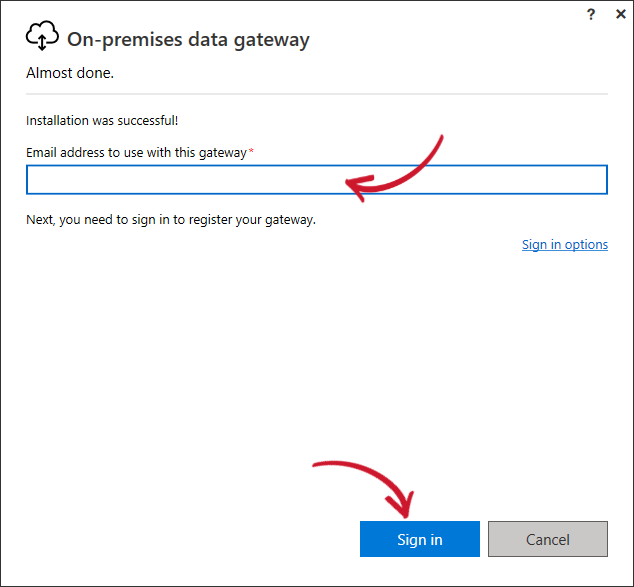
Upon installation, enter the email address to use with the gateway, then click Sign in.
 Signing in
 -
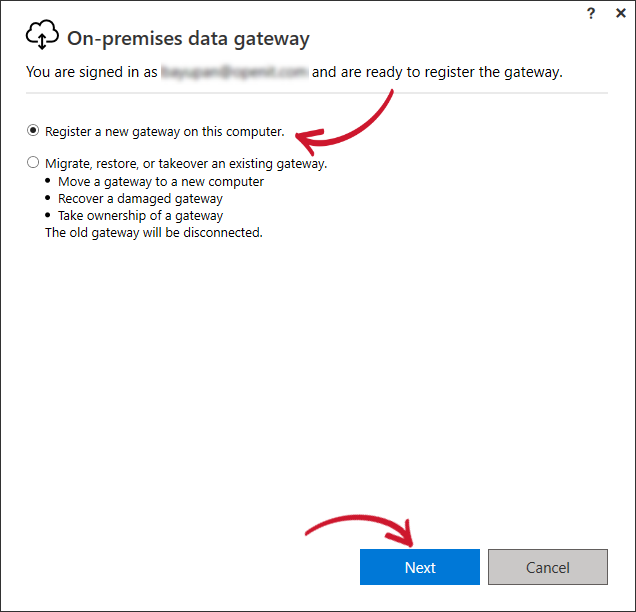
Select Register a new gateway on this computer, then click Next.
 Register a new gateway
 -
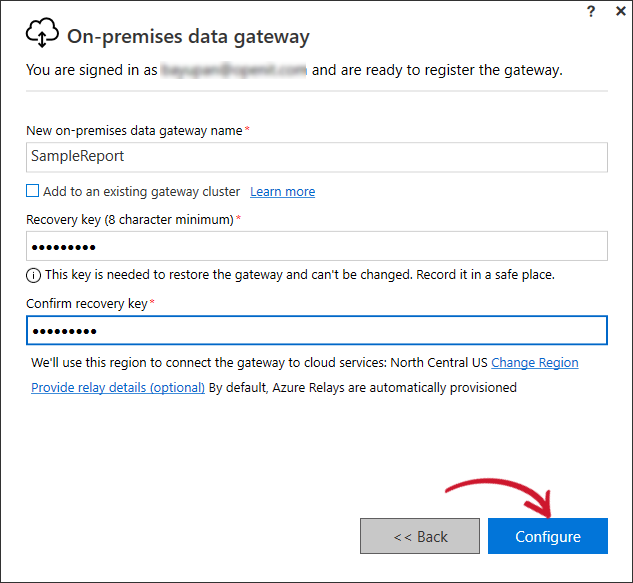
Fill out the required fields to register the on-premises data gateway. It is recommended that you use openit.com as the new gateway name. Fill out the form, then click the Configure button.
 Configuring the new on-premises data gateway
 -
Once installation and configuration are done, click the Close button.
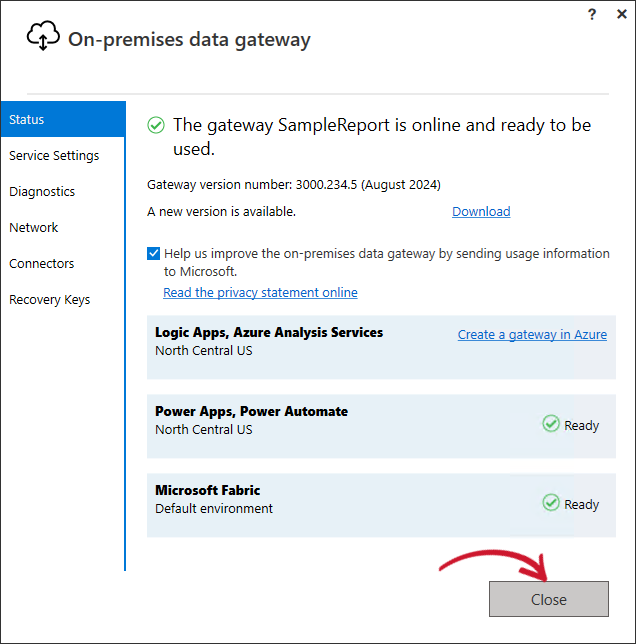 Installation Complete
Setting Up On-premises Data Gateway
-
In the published report, click the
 gear icon to access the Settings. Under the Resources and extensions, select the Manage connections and gateways.
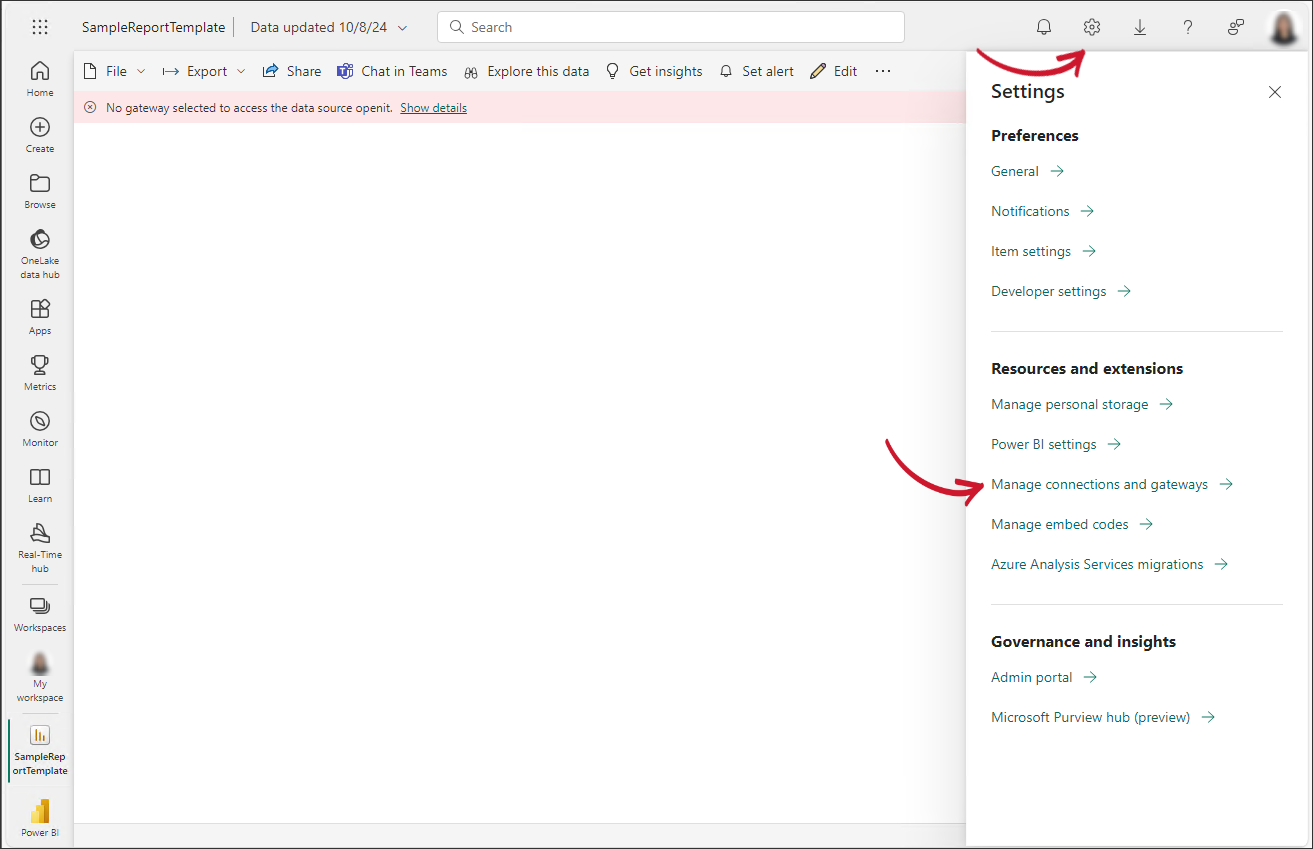 Navigating Settings
 -
Go to the On-premises data gateways tab and verify the added gateway in the Data Gateways table. Click the button under the Status column to bring the gateway online.
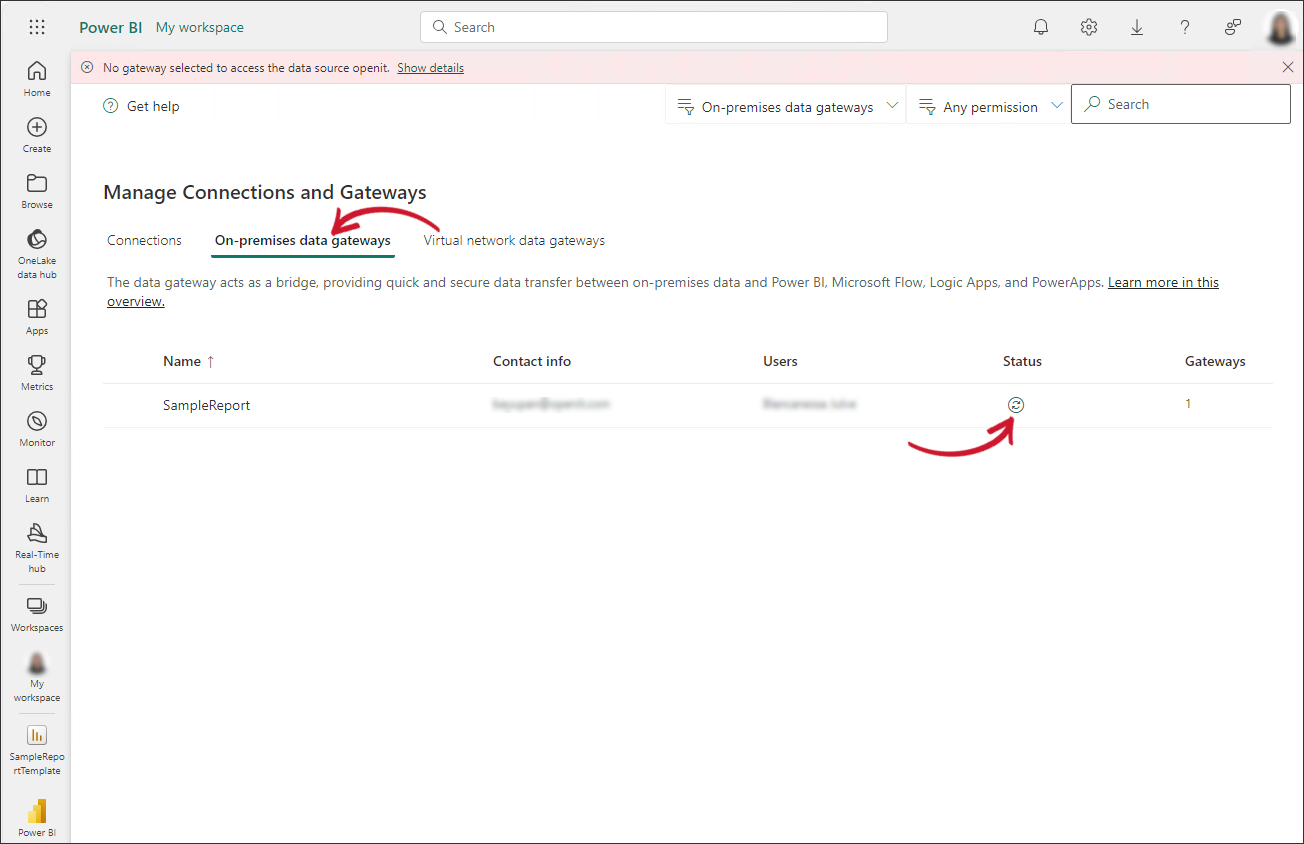 Verifying the created gateway
 -
Add a gateway connection by going to the Connections tab, then clicking the New button at the top-left corner of the window.
A side panel will appear on the right side of the window. Select On-premises. Click the drop-down icon under the Gateway cluster name field and select the newly added on-premises gateway. Fill in the desired Connection name. Click the drop-down icon under the Connection type field and select Analysis Services.
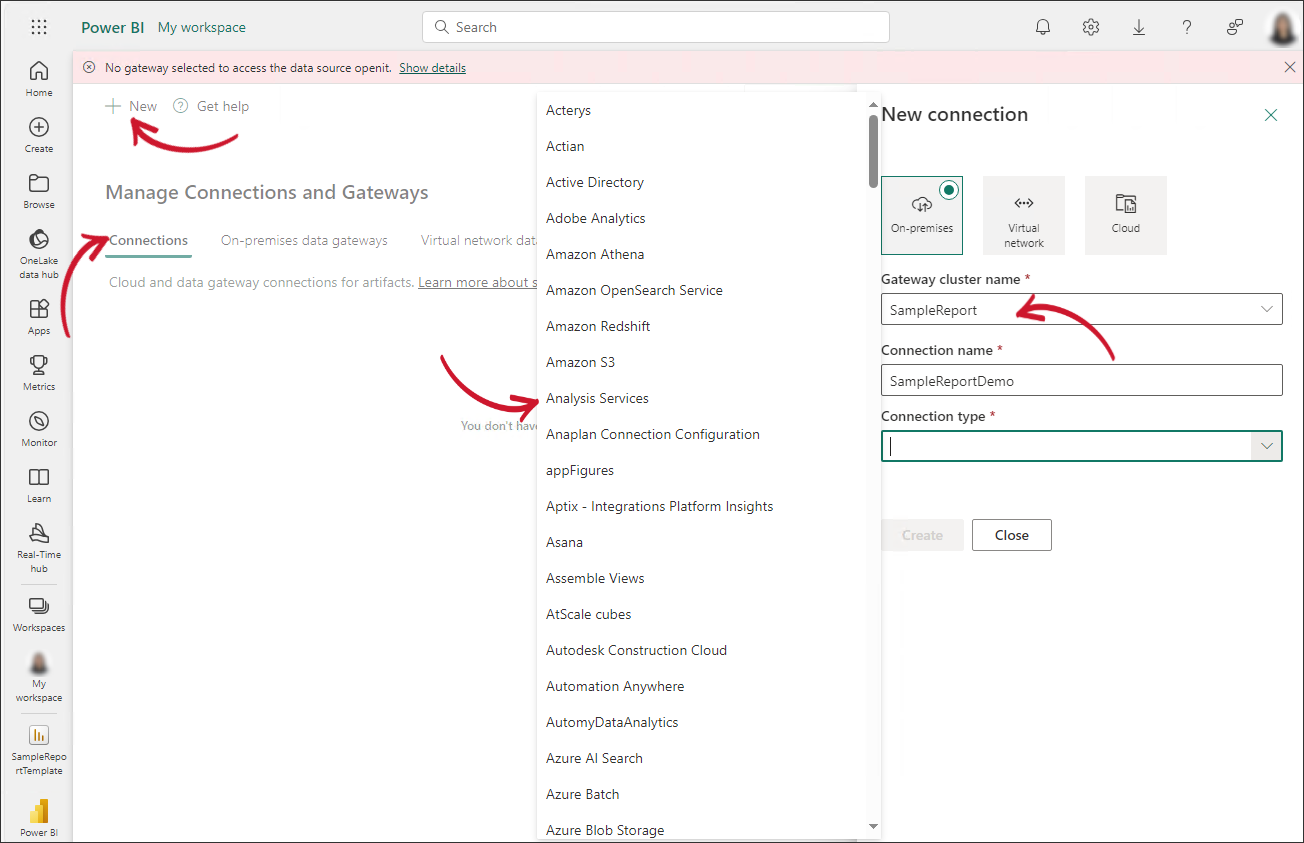 Adding a connection
 -
Fill in the remaining required fields with the following values:
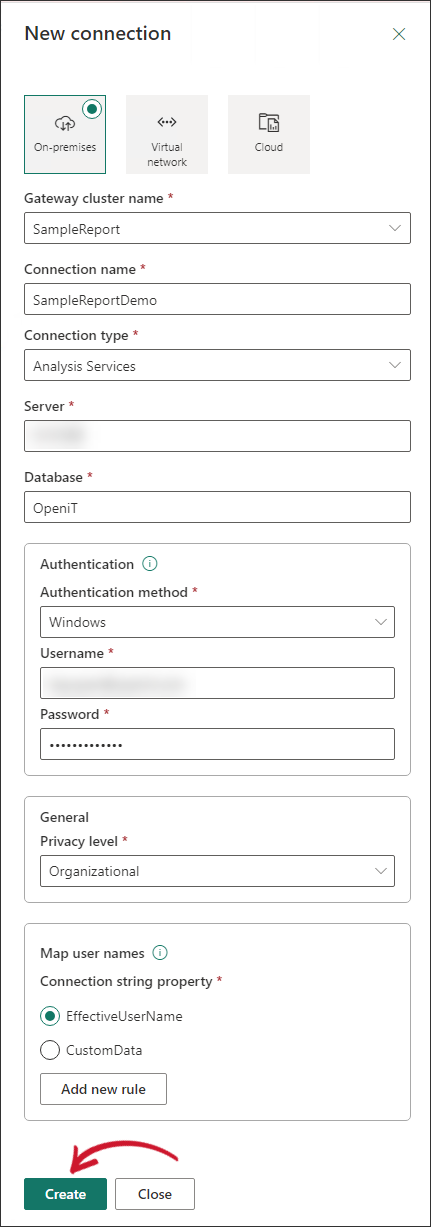 Filling in Connection details
In the Authentication section, enter the username and password using the same credentials used to configure the On-premises data gateways. Complete all the connection fields, then click Create.
Once done, a success message will be displayed at the top part of the panel. Click Close.
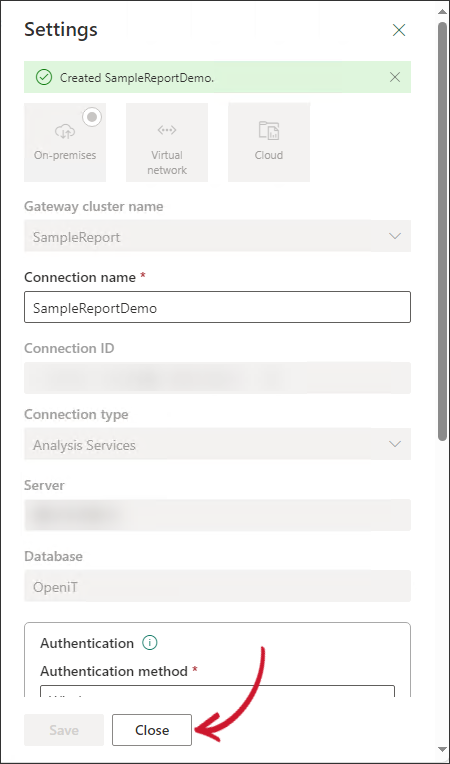 Successful Creation of Data Gateway Connection
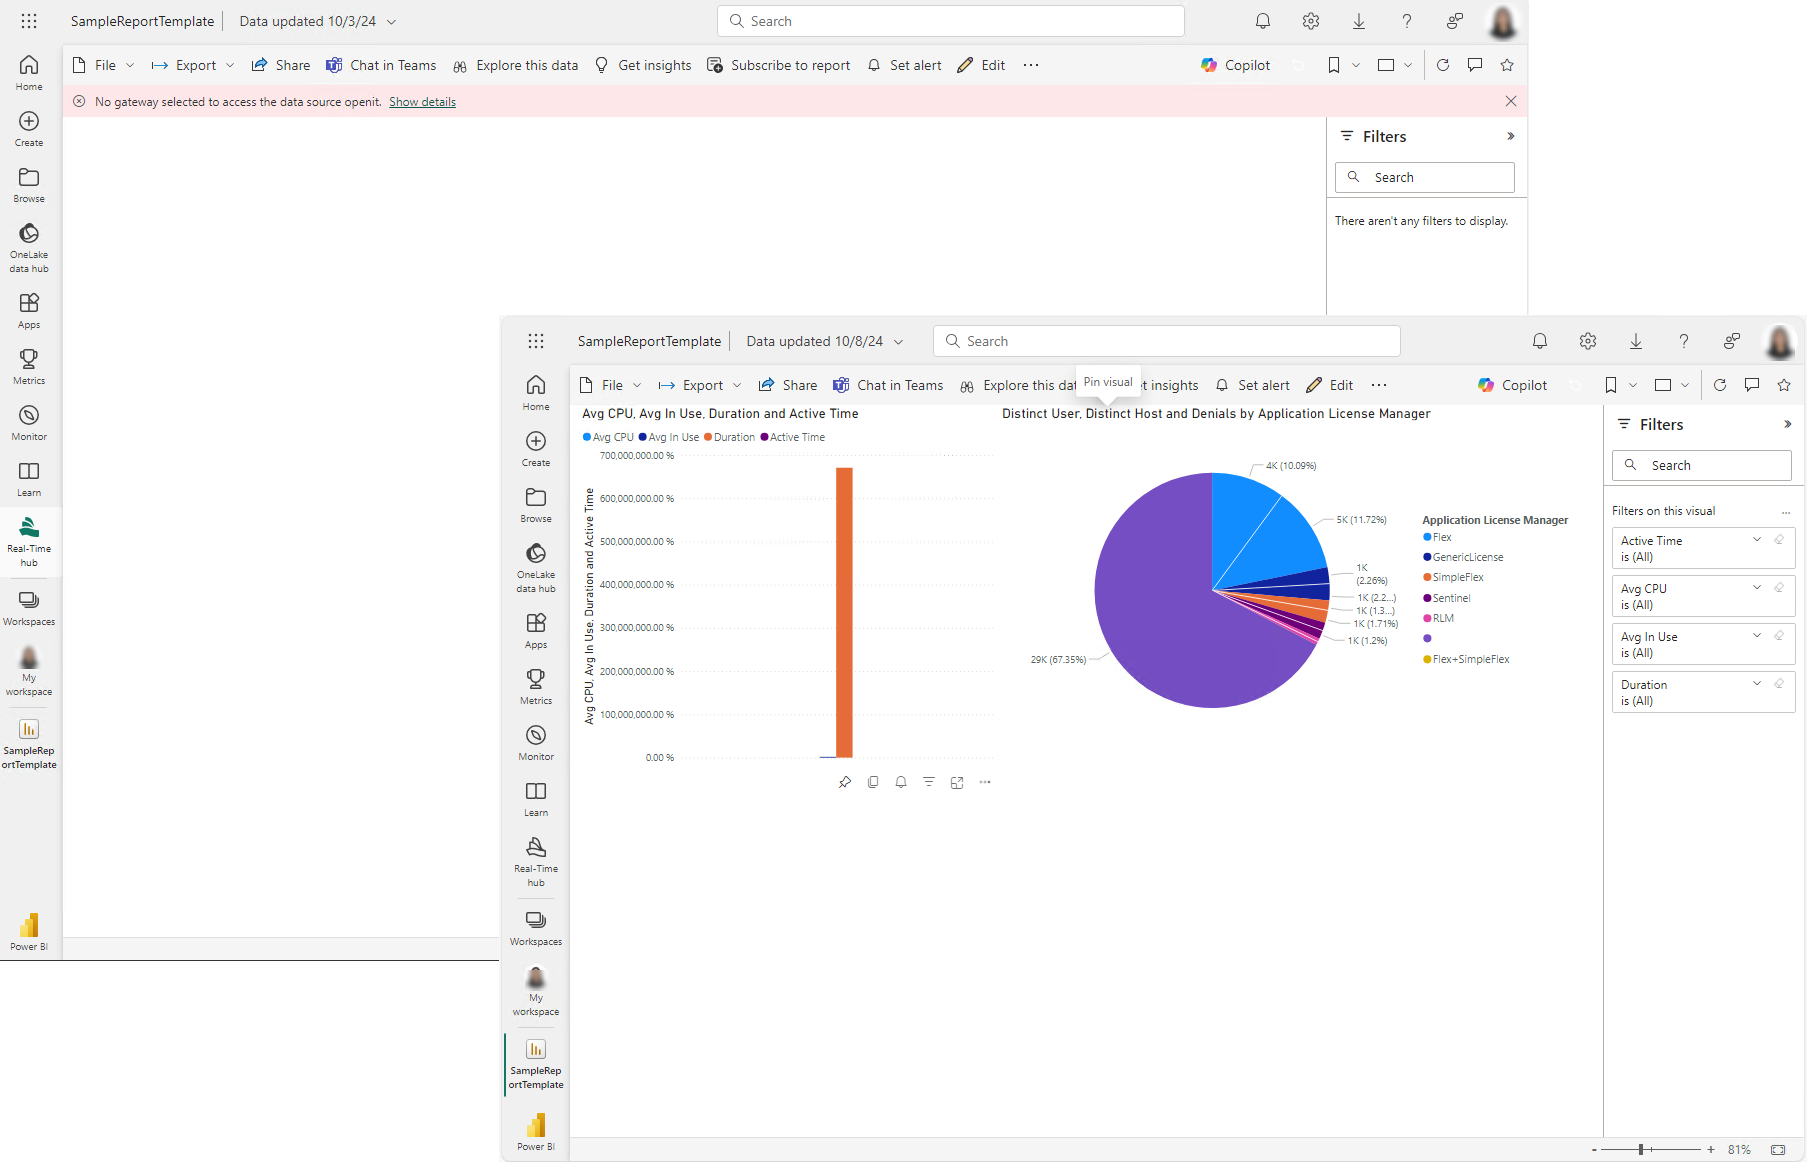
To verify a successful data gateway connection, go to the published report. The report visuals should be loaded properly.
Refer to the official Microsoft documentation for a more comprehensive Power BI reporting guide.